5
Dec
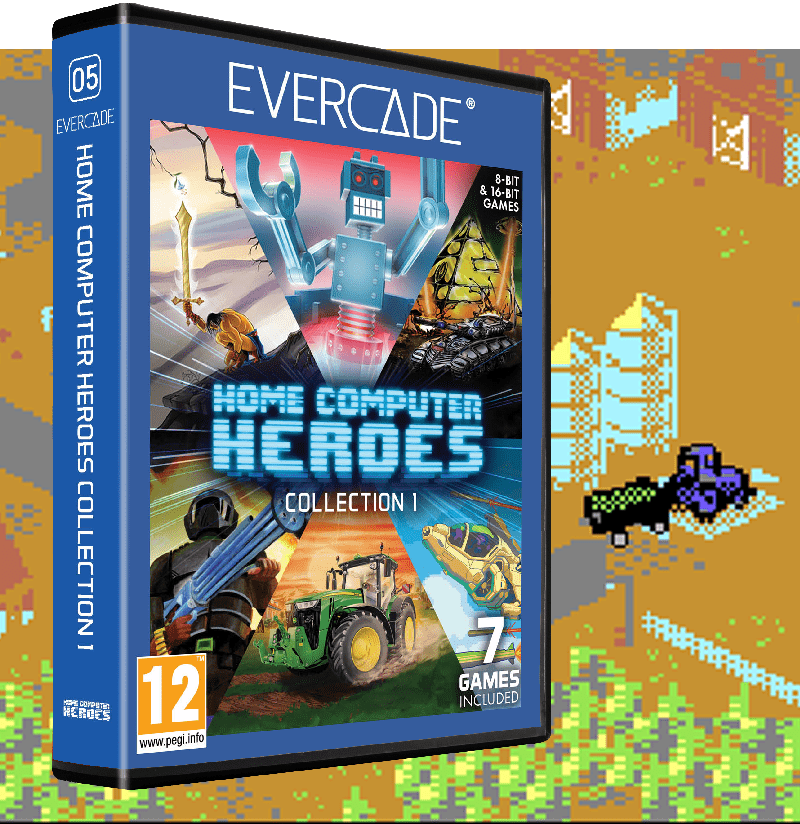
Evercade Game Spotlight: Planet X2 (Home Computer Heroes Collection 1)
It’s time to take an in-depth look at one of the most complex, ambitious games on Evercade: the impressive Planet X2 from Home Computer Heroes Collection 1. While it may look simplistic at first glance compared to other games in our library, consider that this is a real-time strategy game developed for the C64 home computer — an 8-bit machine with just 64K of RAM.
To look at it from another perspective: the real-time strategy genre didn’t really exist when the C64 was in its heyday. The ambitious 1981 title Utopia for Intellivision (no relation to the Gremlin game) is cited by some as a first attempt and titles like Bullfrog’s Populous and PowerMonger or Sensible Software’s Mega-Lo-Mania definitely have elements of the genre, but most people tend to point to 1992’s Dune II by Westwood Studios as the first real example of what we know today as real-time strategy. While the C64 still had some active users at that point, most home computer users had graduated to MS-DOS based PCs with considerably higher specs than the humble ’64.
Planet X2 was developed in 2017, of course, but it’s still an impressive achievement considering the limited tech it’s running on. Real-time strategy games demand that the computer keep track of lots of simultaneously moving parts at the same time, and early microcomputers like the C64 really weren’t built with that sort of thing in mind. And yet developer David Murray, also known as retro tech YouTuber The 8-Bit Guy, successfully managed to pull it off, putting together a challenging but immensely satisfying game that is very rewarding to get to grips with.
We appreciate that the “getting to grips with it” part might feel like an uphill struggle, though, so let’s take a step-by-step look at how the opening stages of a typical playthrough go, and it will hopefully give you the confidence to tackle the rest of the game by itself. You may want to print this page out or have it easily accessible on a phone or tablet so you can follow along while you play. Hit the Menu button on the Evercade controller at any point if you need to pause the action and refer to anything.
When you’re ready, fire up Planet X2 from the Home Computer Heroes Collection 1 cartridge and, when the title screen appears, press X to start the game on the default “River Divide” map at the standard difficulty level.

Your goal in Planet X2 is simple: wipe all the enemy Pyramids off the map before they destroy all your Factories. You start with one Factory but can build more; enemy bases, meanwhile, are in predefined locations and will continually spit out troops to harass and eventually conquer you if you don’t take steps to defend yourself before going on the offensive.
Let’s start with a look at how Planet X2’s interface works.
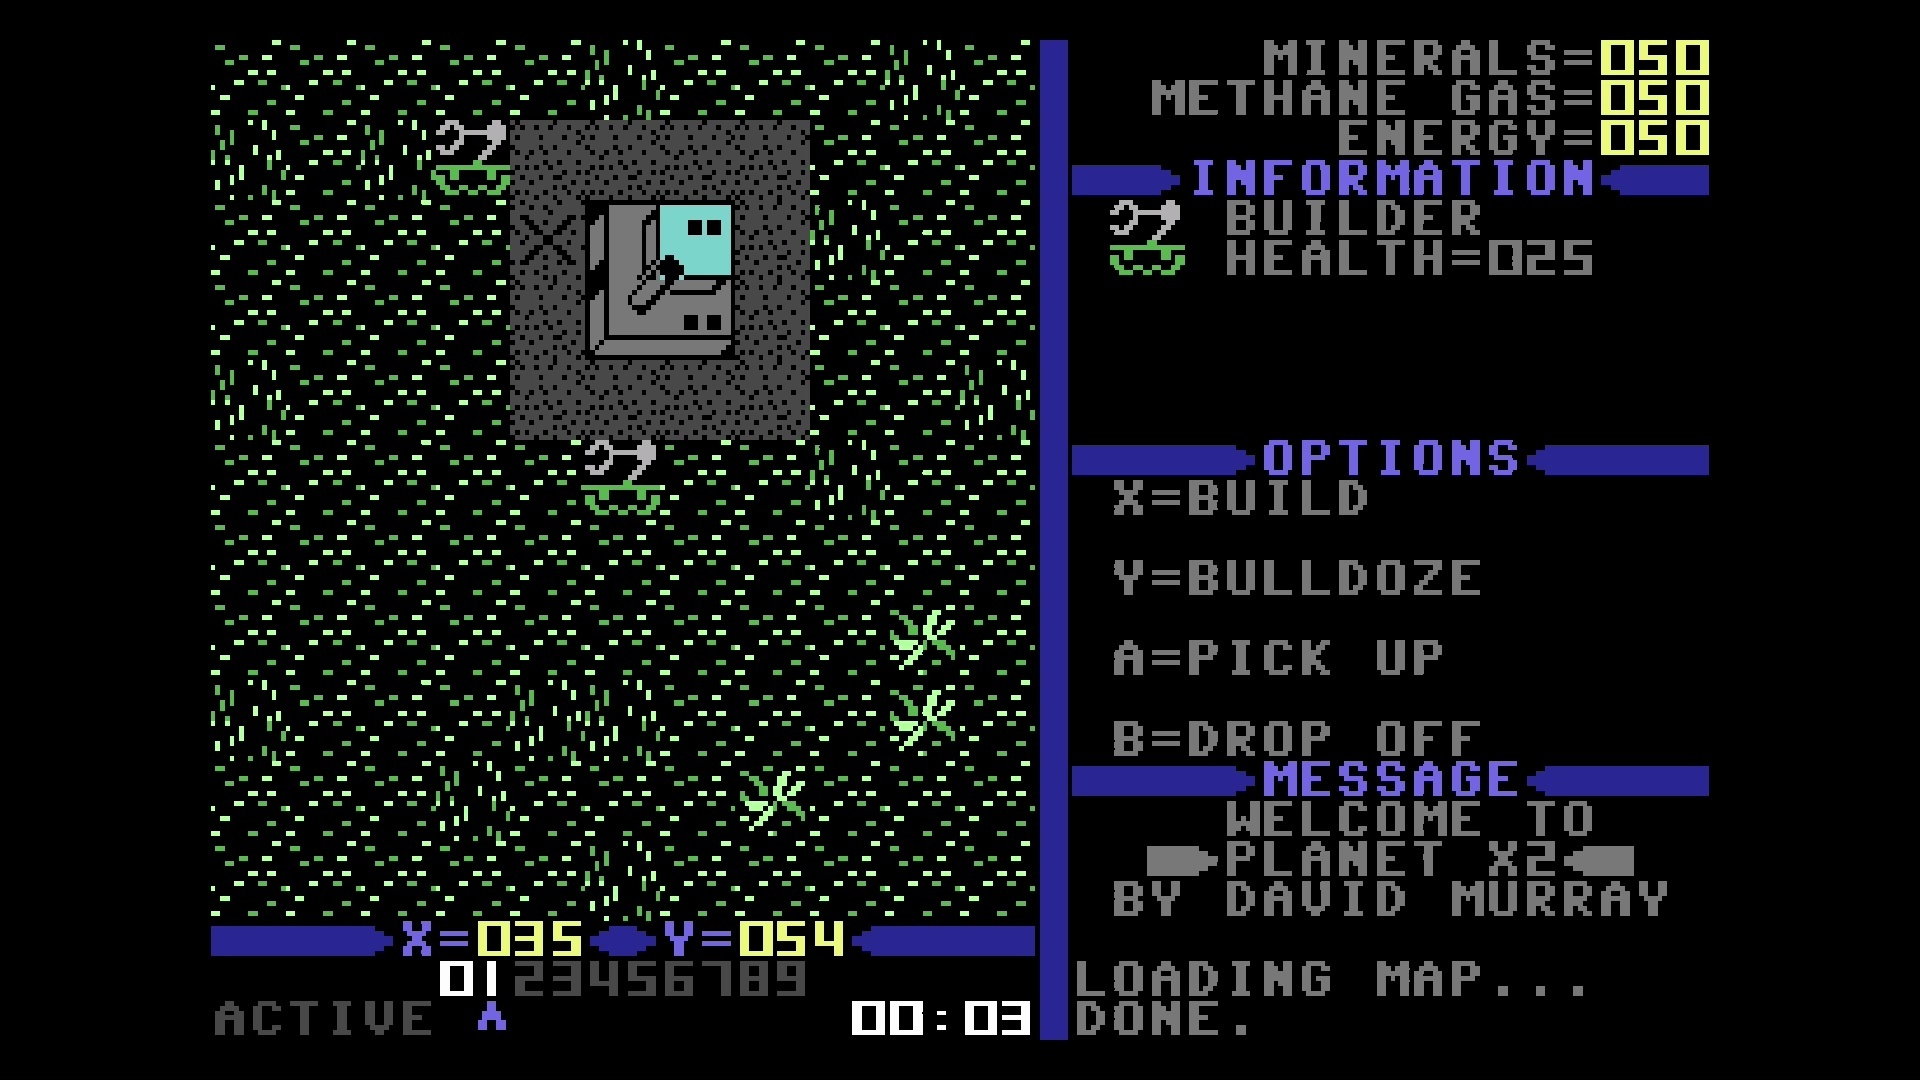
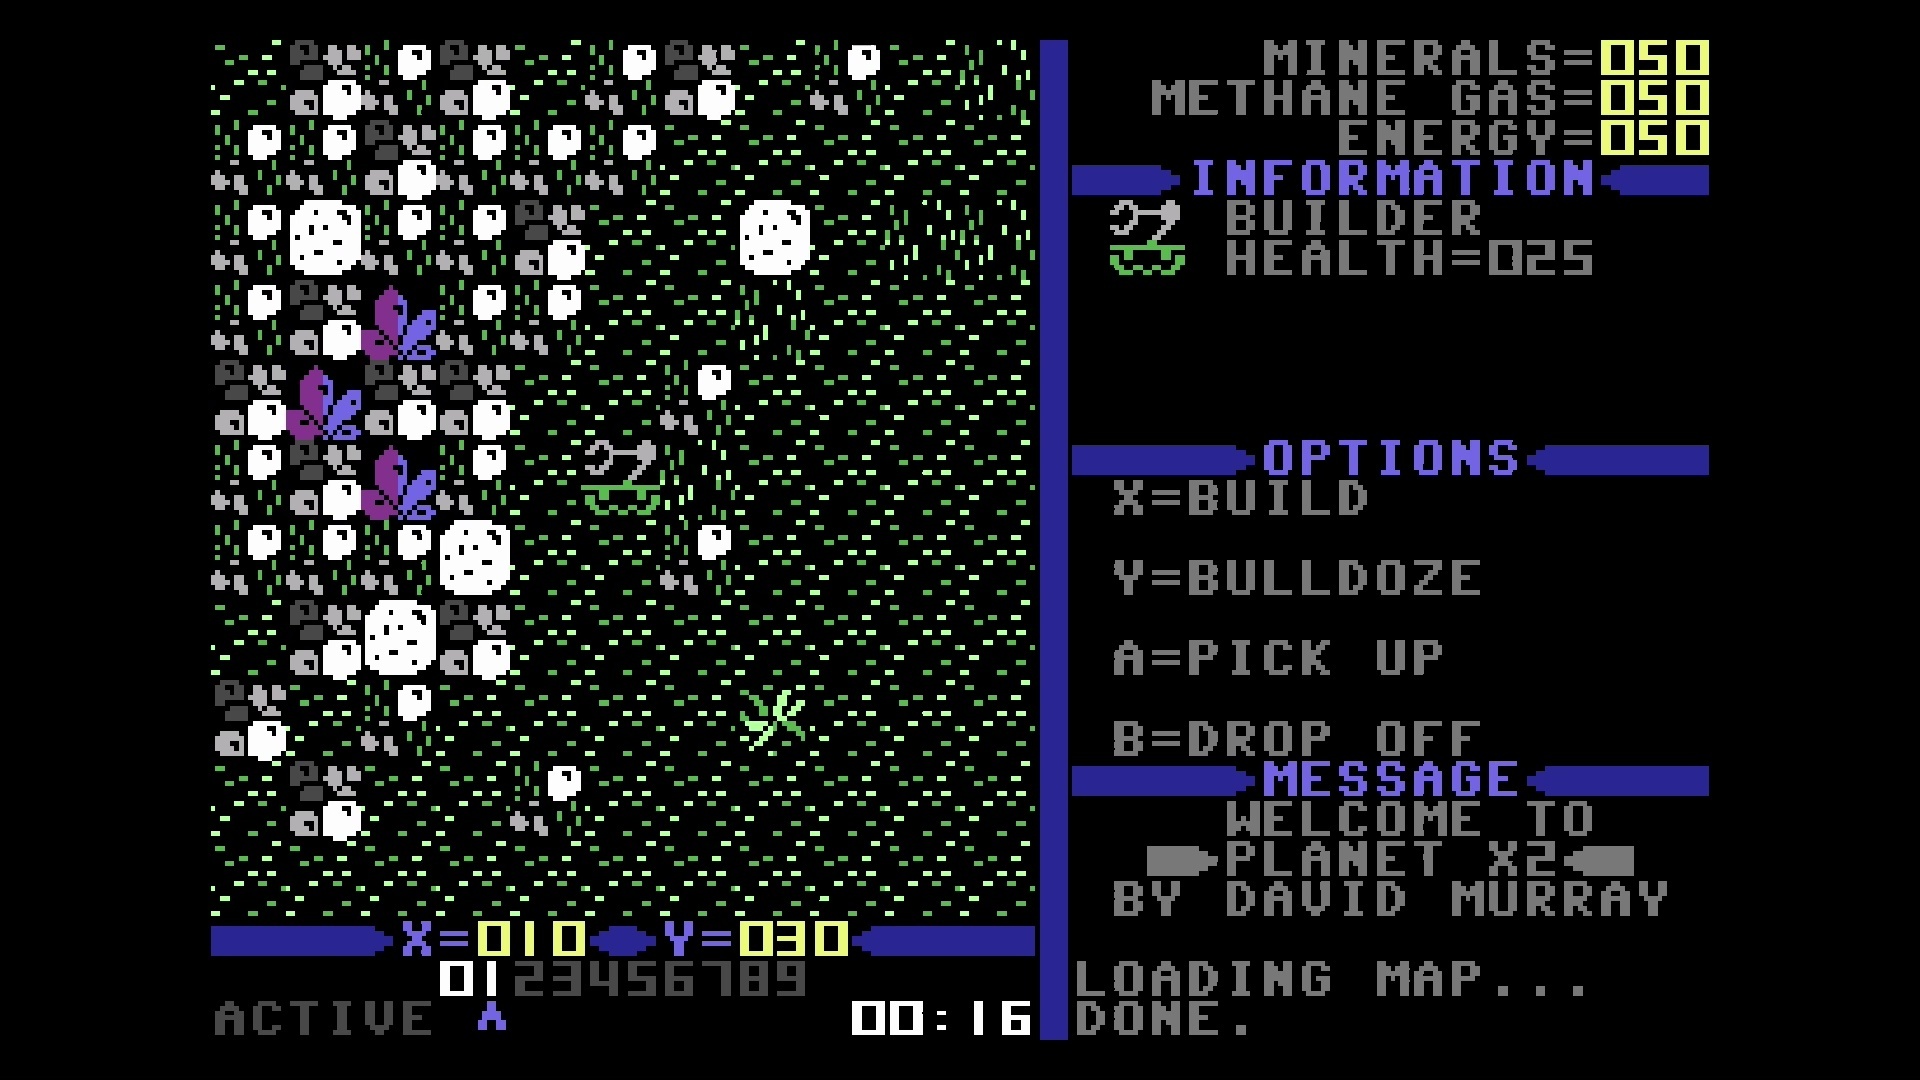
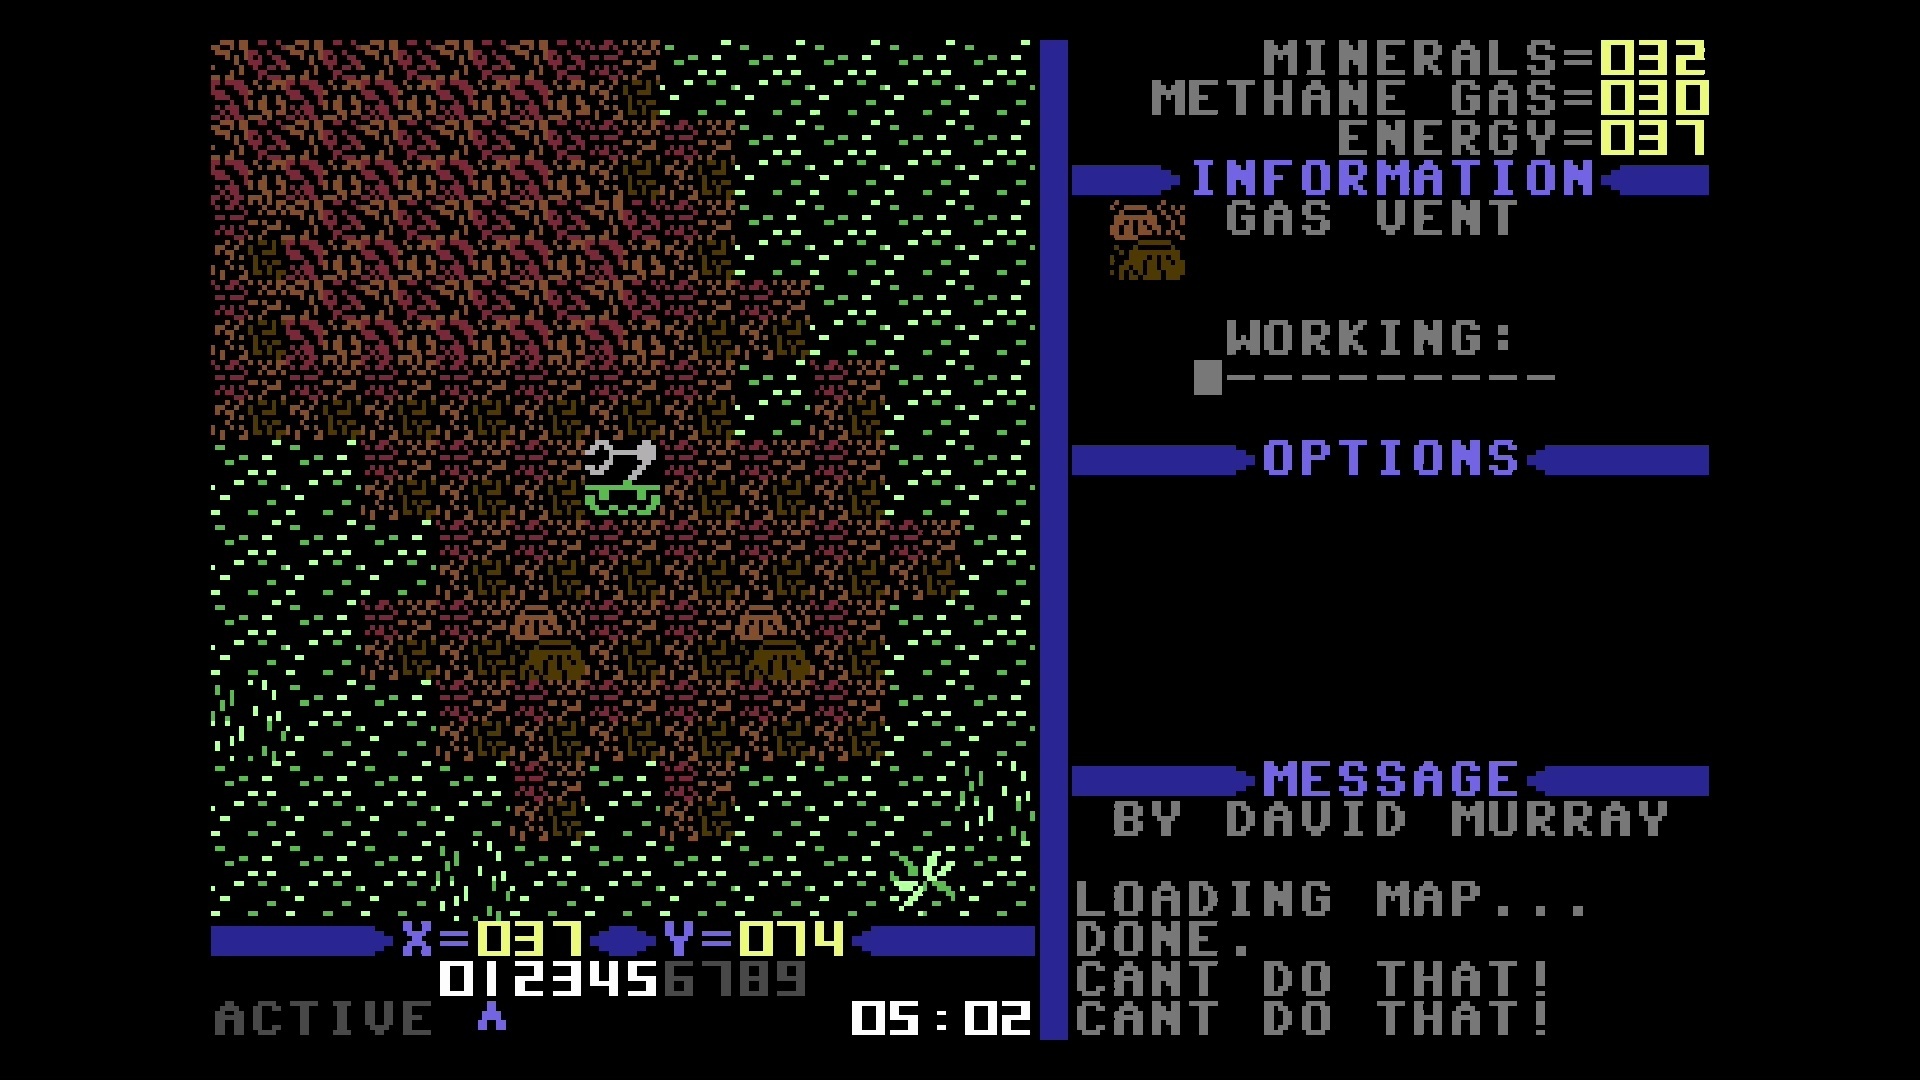
Once the map is loaded, you’ll see this screen. On the left is the main game window, where you can see your currently selected unit or building and its surroundings. Beneath that is the coordinate display and a bar of numbers that indicates how many of the 10 possible units you have in play, and which one is currently selected. There’s also a clock here showing you how long you’ve been playing the current mission.
The panel on the right is split into several main components. The top part shows your three main resources: minerals, methane gas and energy. You will need all of these to construct new buildings and units.
Underneath that, you’ll see the Information panel for the currently selected unit or building. This will generally display the unit or building’s name and current health value. Note that both units and buildings will survive at 0 health, but will be destroyed if they drop below that.
Next we have the Options panel, which indicates the possible actions you can take with the currently selected unit or building. You will use the Evercade face buttons A, B, X and Y to perform the actions on this panel. Sometimes, when there are more than four possible actions, you can also hold L1 and press one of the face buttons to do something. This panel will indicate when that is an option. L-X, for example, indicates that you should hold L1 and press X.
Then finally there’s the message window, which tells you things you need to know when you need to know them.
Initially, you’re in control of a Builder unit, which looks like a big robotic arm on a set of tank tracks. You can move it around with the D-Pad. Tap a direction to move a single space, or hold a direction to move at high speed in that direction. Notice that the coordinates display below the main window updates as you move. Before you go too far, make a note (mentally or physically) of the coordinates your base is located at.
One of the first things we should do is get some resources rolling in. Head to the northwest (up and left) until you reach the area and coordinates seen above. This is a patch of rocks with some crystals in the middle. All of these rocks and crystals can be taken back to base for processing into minerals, but the crystals are the most efficient and valuable.
To pick up a crystal, move your Builder next to it and press A for the Pick Up command. Then use the D-Pad to move the cursor over the crystal and press R1 to confirm. R1 to confirm is a standard convention throughout Planet X2.
You may find a rock blocking your path to the crystal. If this is the case, you can press Y for the Bulldoze command and use the D-Pad and R1 to demolish small rocks, or use A to Pick Up larger boulders, move to a convenient location and use B to drop them in another location. In all cases, the target to pick up or the location to drop off is determined by the D-Pad to move the cursor, and R1 to confirm. If for any reason you need to cancel an action, select an empty location or the vehicle performing the action and press R1. To cancel an action that has a submenu, such as the Build command, hold L1 and press Start.
Once you have picked up a crystal, head on back to your base, stop next to the “X” mark on the ground and use B for the Drop Off command. Use the D-Pad to move the cursor over the “X” mark and press R1 to drop the crystal.
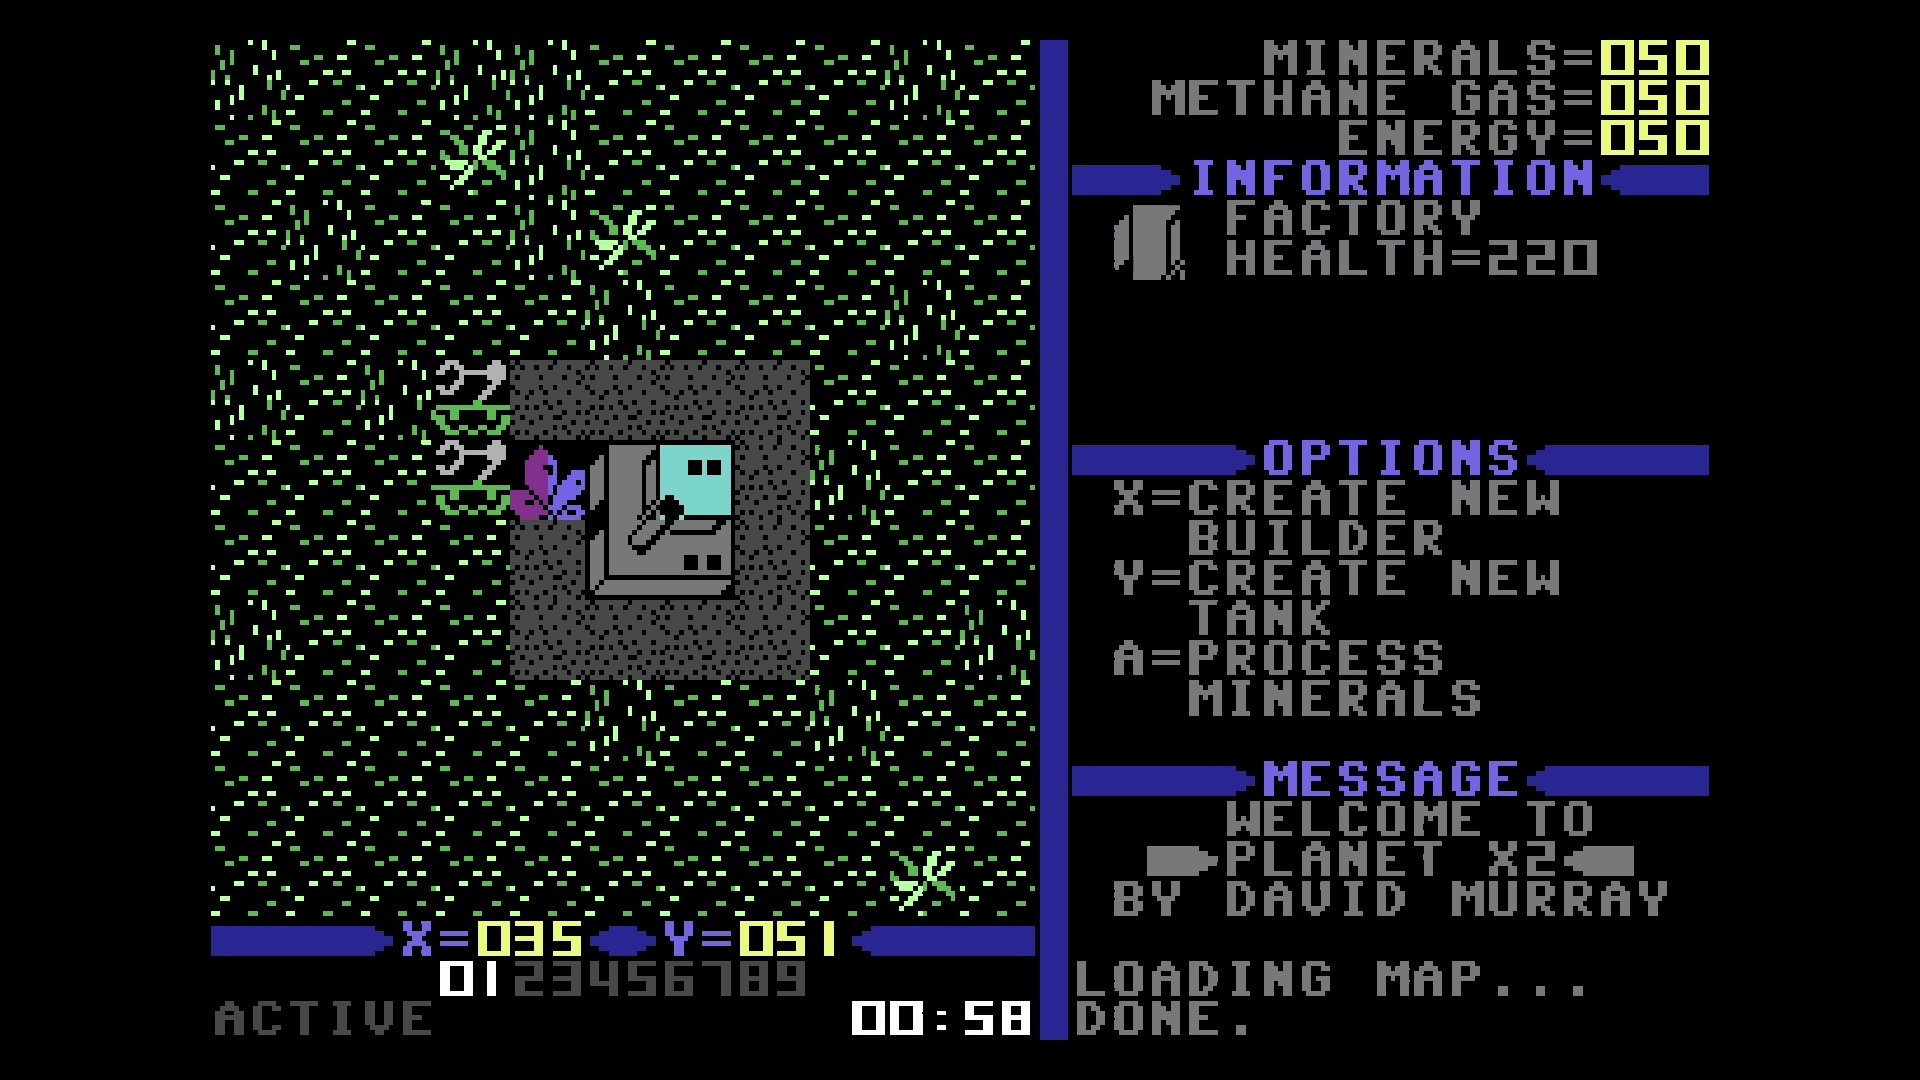
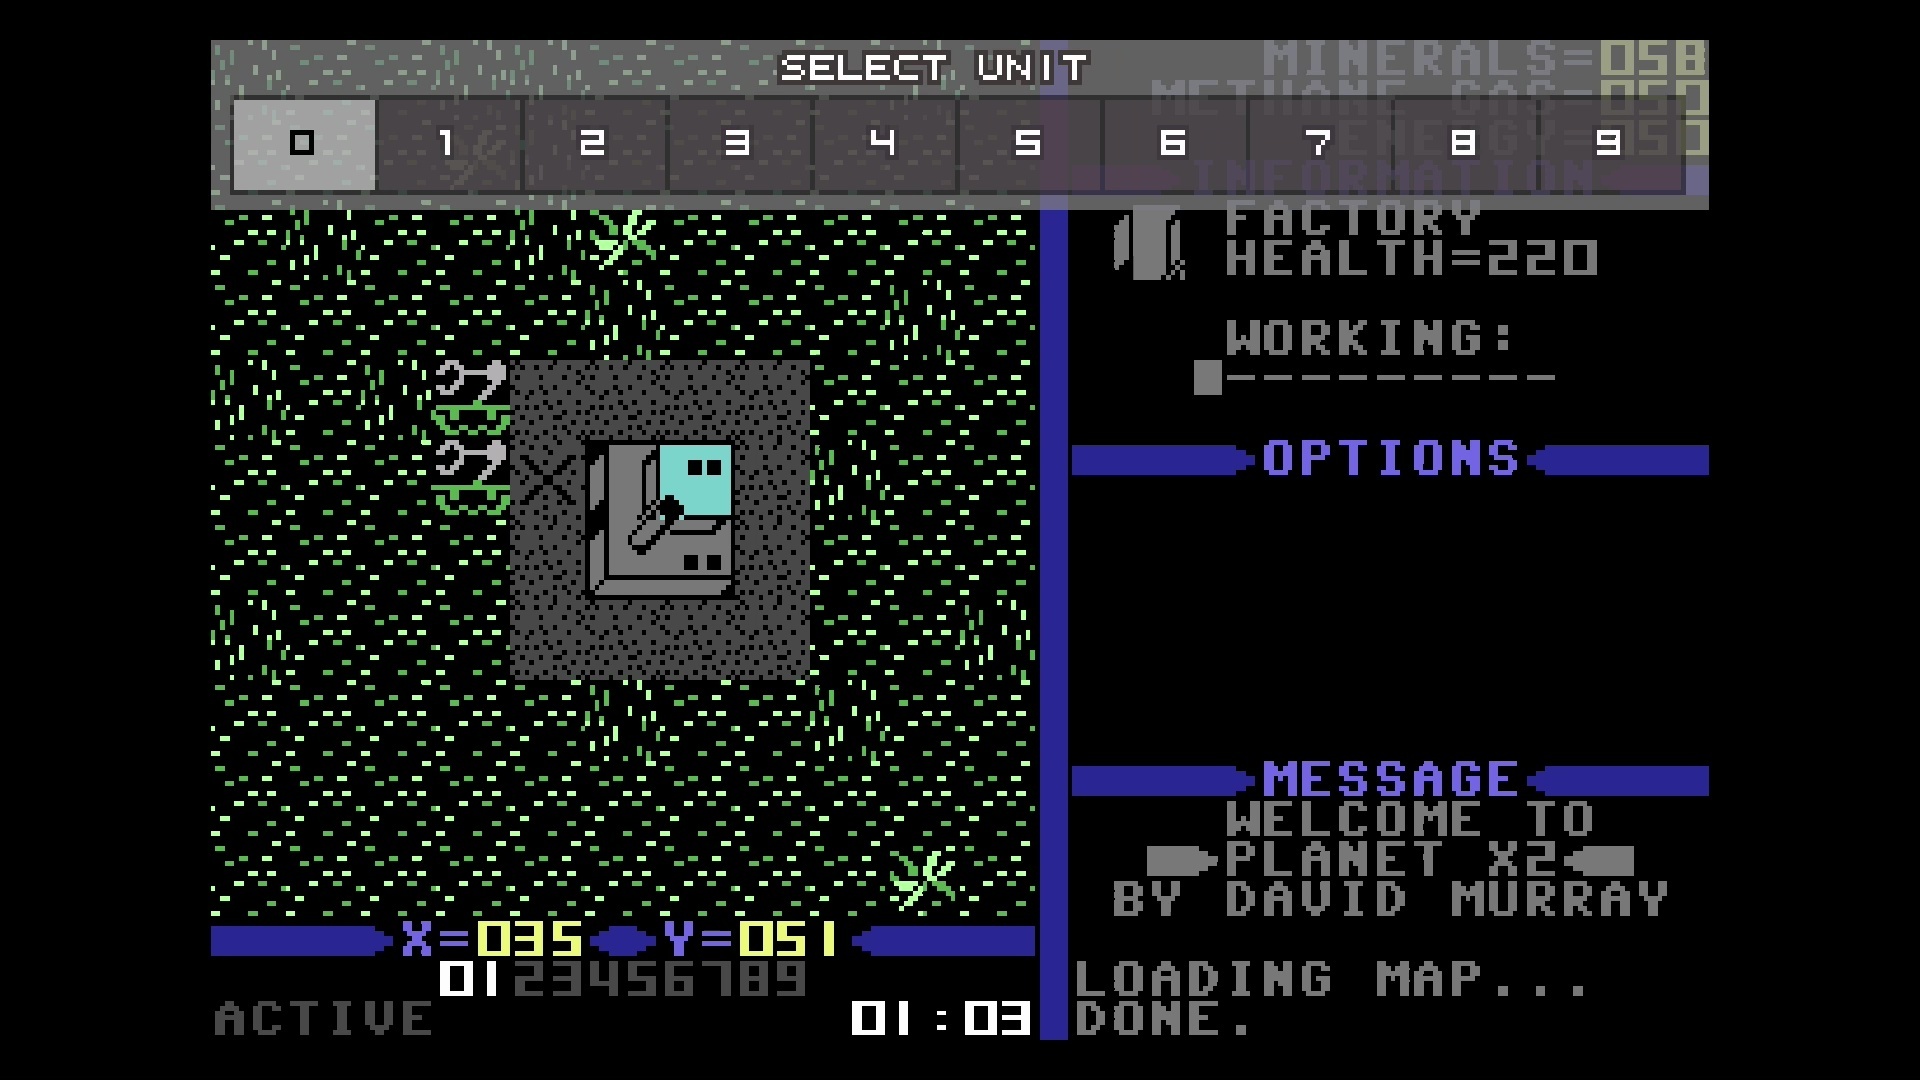
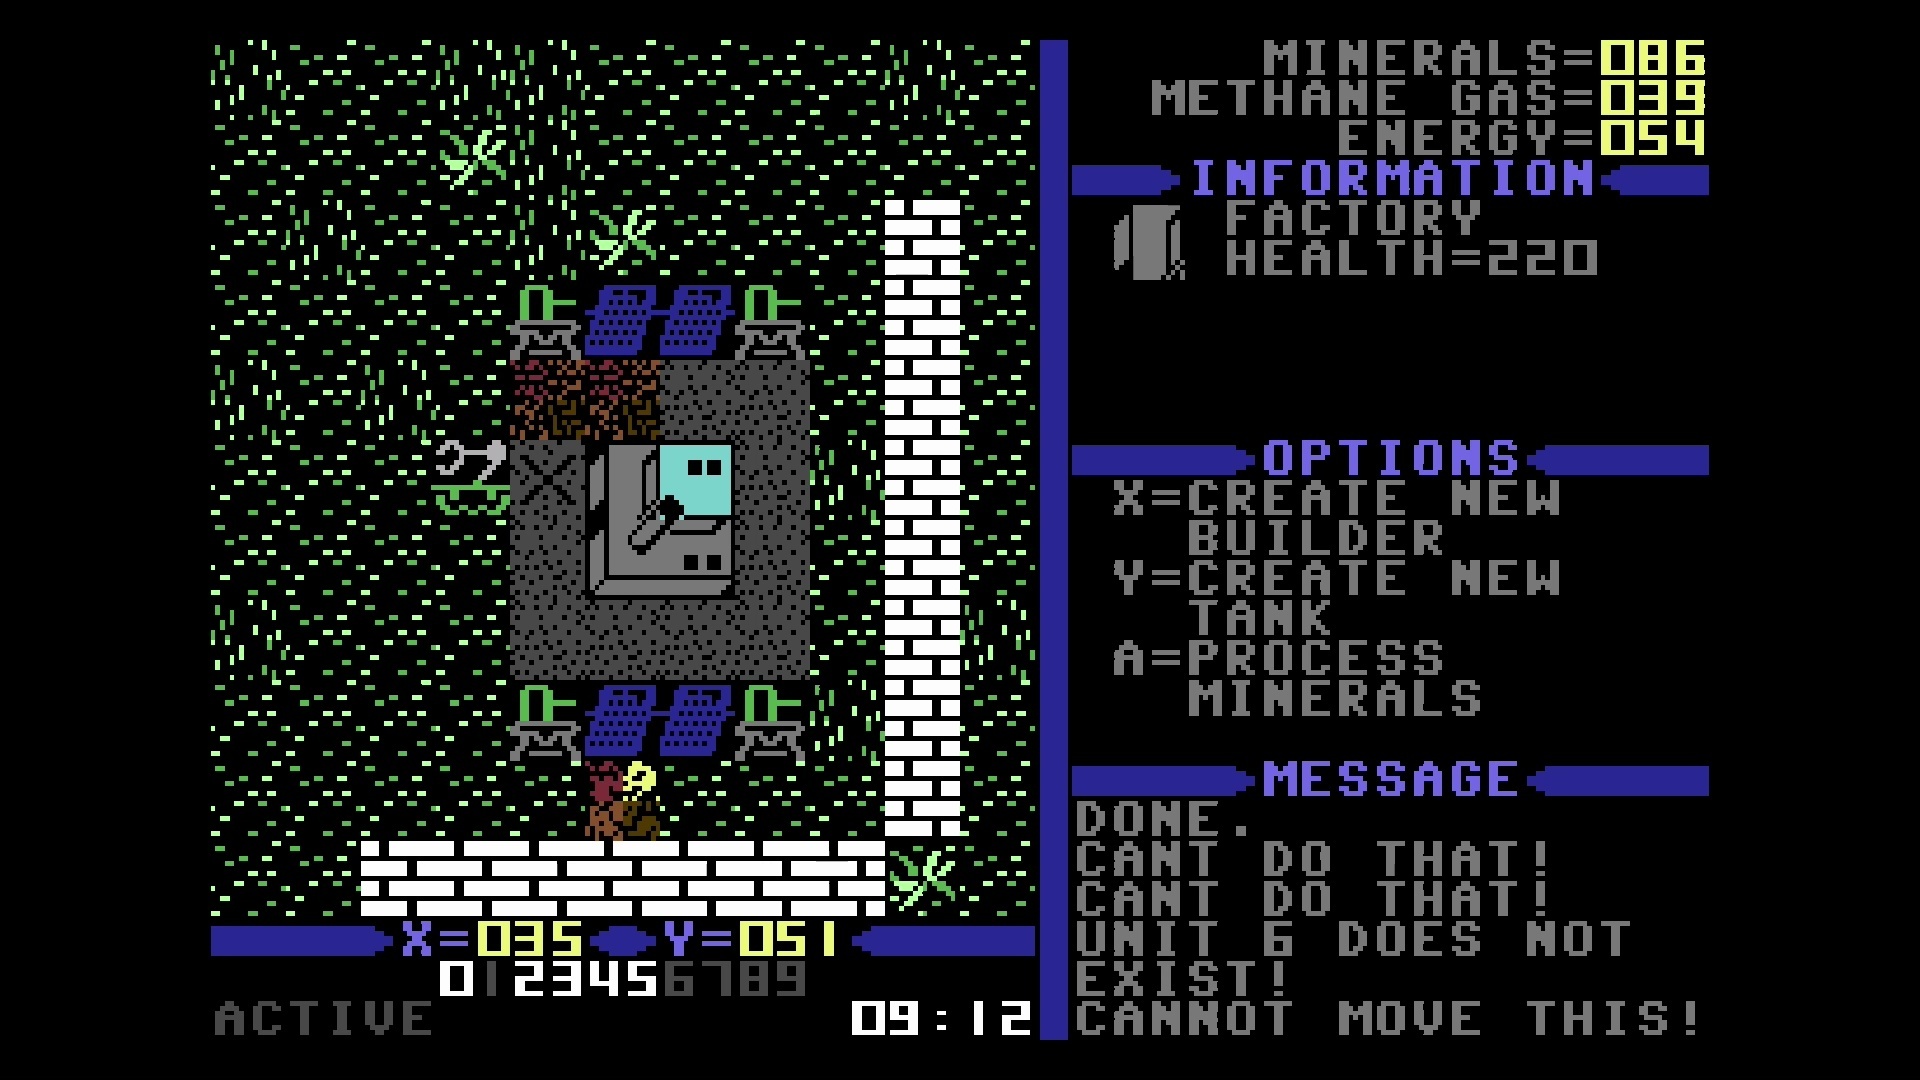
Next we need to tell the Factory to process the minerals. To select the Factory either press Start, move the cursor over the Factory building and press R1, or hold L1 and push Left or Right on the D-Pad until the Factory is selected. It’s better to get used to this latter option as it allows you to quickly switch back to your Factory or other buildings even if you were previously in control of a vehicle that is a long distance away.
With the Factory selected, press A for Process Minerals. After a moment, a “Working” bar will appear in the Information display. This shows how long it will take the Factory to completely process the minerals you dropped off. It is unable to perform other functions until this job is complete, but you will notice your Minerals count at the top of the right-side panel gradually increasing while processing is in progress.
While you wait, it’s not a terrible idea to take one of your Builders back to the mineral field and pick up the other crystals.
To switch between vehicles, press Select to bring up the unit hotbar. Use the D-Pad to select unit number 0-9 (at this point, your two Builders are units 0 and 1) and press A to confirm. Then press Select to close the hotbar.
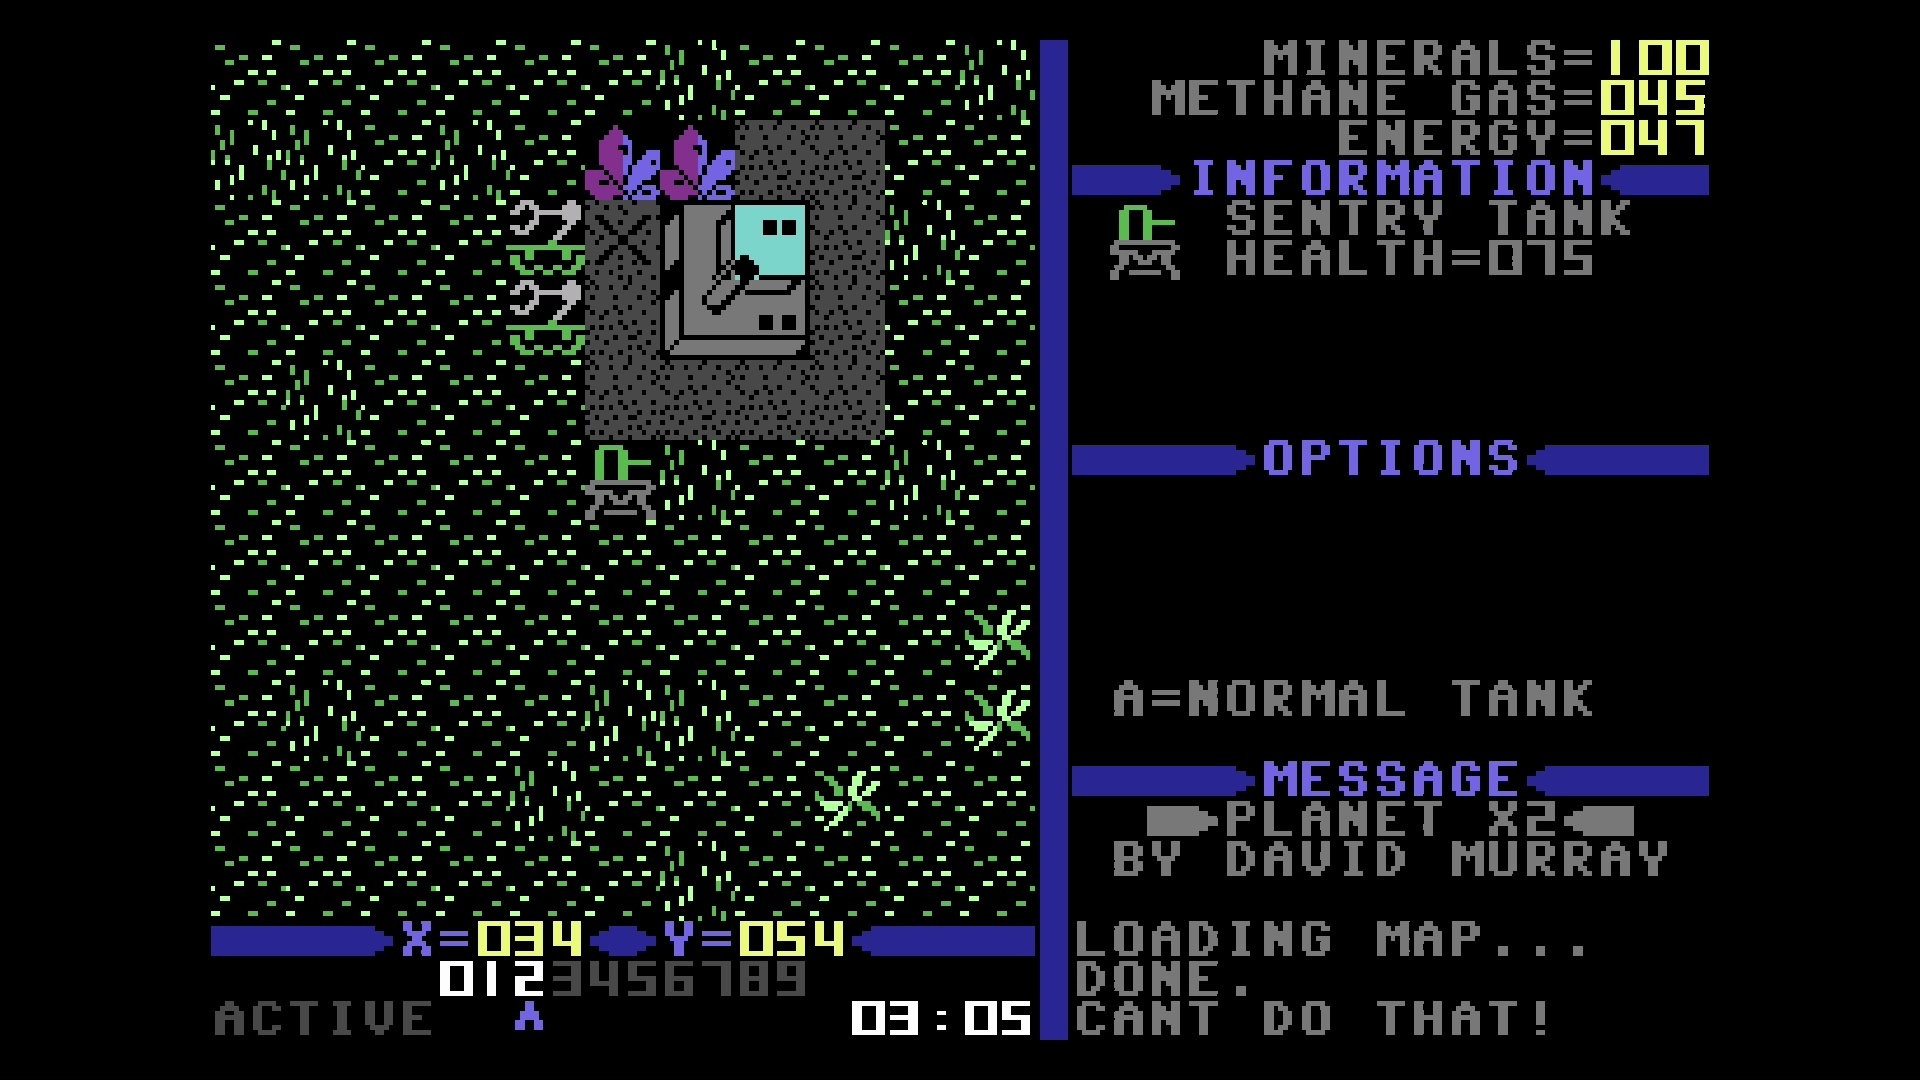
When the Factory is done processing, select it with L1+D-Pad and press Y to build a Tank. Once the Tank has been constructed, select it with the hotbar (it should be unit 2) and move it out of the way of the “X” mark on the ground.
Position it a little to the south of the Factory and press A to turn it into a Sentry. This is a static turret that will automatically fire on any enemies that come within five squares. Repeat this process a few times until you’ve established a nice defensive perimeter. Use your Builders to load another crystal into the Factory and process the minerals if you need more resources.
It’s worth getting some other infrastructure in place while you do this. Use your Builder to construct Solar Panels anywhere to obtain an income of Energy, and head to a gas vent on a lava field to construct a Refinery to obtain Methane Gas. A convenient lava field with three gas vents is a little to the southwest of your starting location.
To build using your Builder, move it on or adjacent to the location you would like to build, press X to build, then press the appropriate button or buttons to choose the structure you want to create. If necessary, select a location with the D-Pad and press R1 to confirm — in the case of Refineries, for example, you must move the cursor over the gas vent and press R1 to begin construction. Other structures will simply be built where the Builder is currently located, and it will move out of the way once the job is done. Remember, if you decide you don’t want to build where you currently are, you can hold L1 and press Start to cancel out of the Build submenu.
It doesn’t hurt to build some Walls, either. Your Sentries can fire through the walls at approaching enemies while remaining protected. On this scenario, enemies will only come from the east and south, so you only need to build walls on these sides of your base.
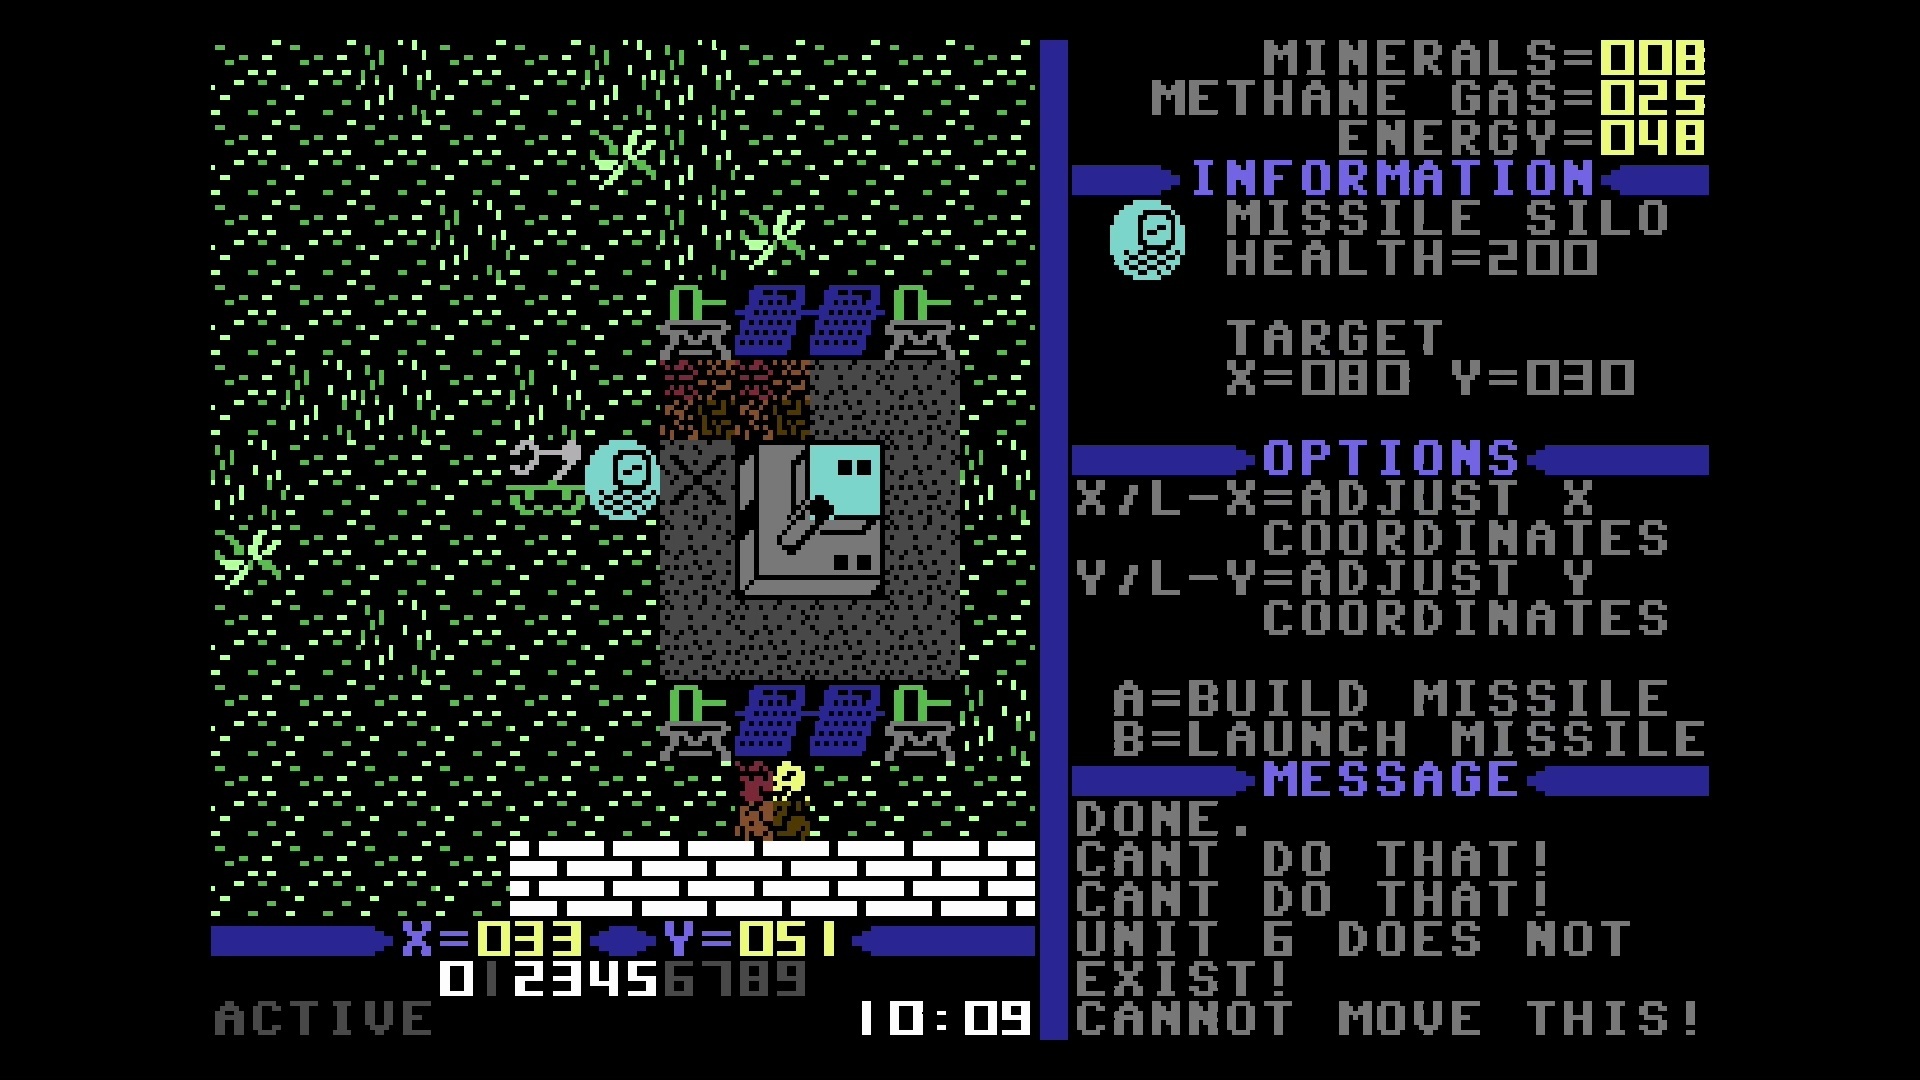
Once you’re in a solid defensive position, consider building a Missile Silo. Make sure this is positioned well behind your defensive boundary so the enemies can’t reach it easily. If you have enough resources, select the Missile Silo and press A to build a missile also. If you’re short on resources, wait for your Energy and Methane Gas reserves to charge up from your Solar Panels and Refineries respectively — you did remember to build them earlier, right? — and head off in search of rocks or crystals if you need more Minerals.
Try not to get any of your resources get too low. If you end up in a situation where you’re not able to build any new Builders or Tanks and all your existing units have been destroyed, you can pretty much kiss any chance of victory goodbye. Refer to the Home Computer Heroes Collection 1 manual for the quantities of each resource all units and buildings need.
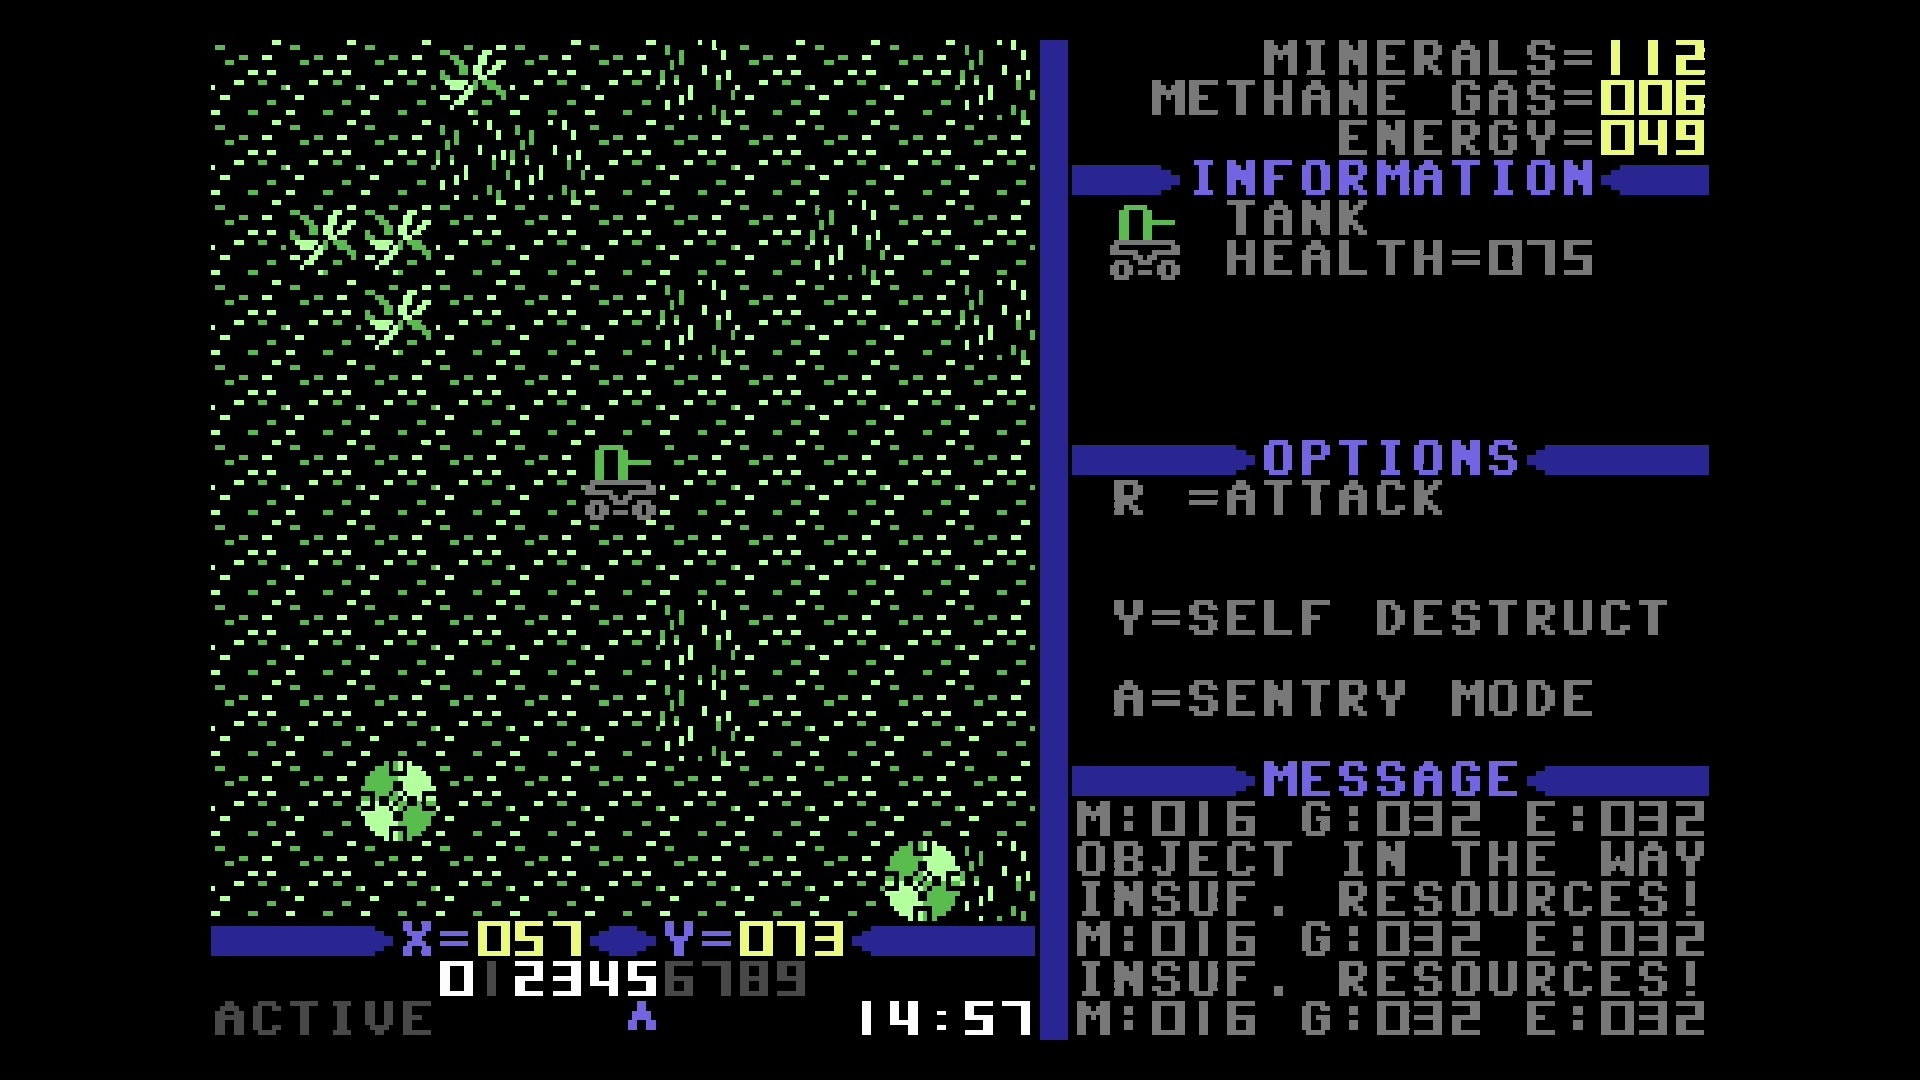
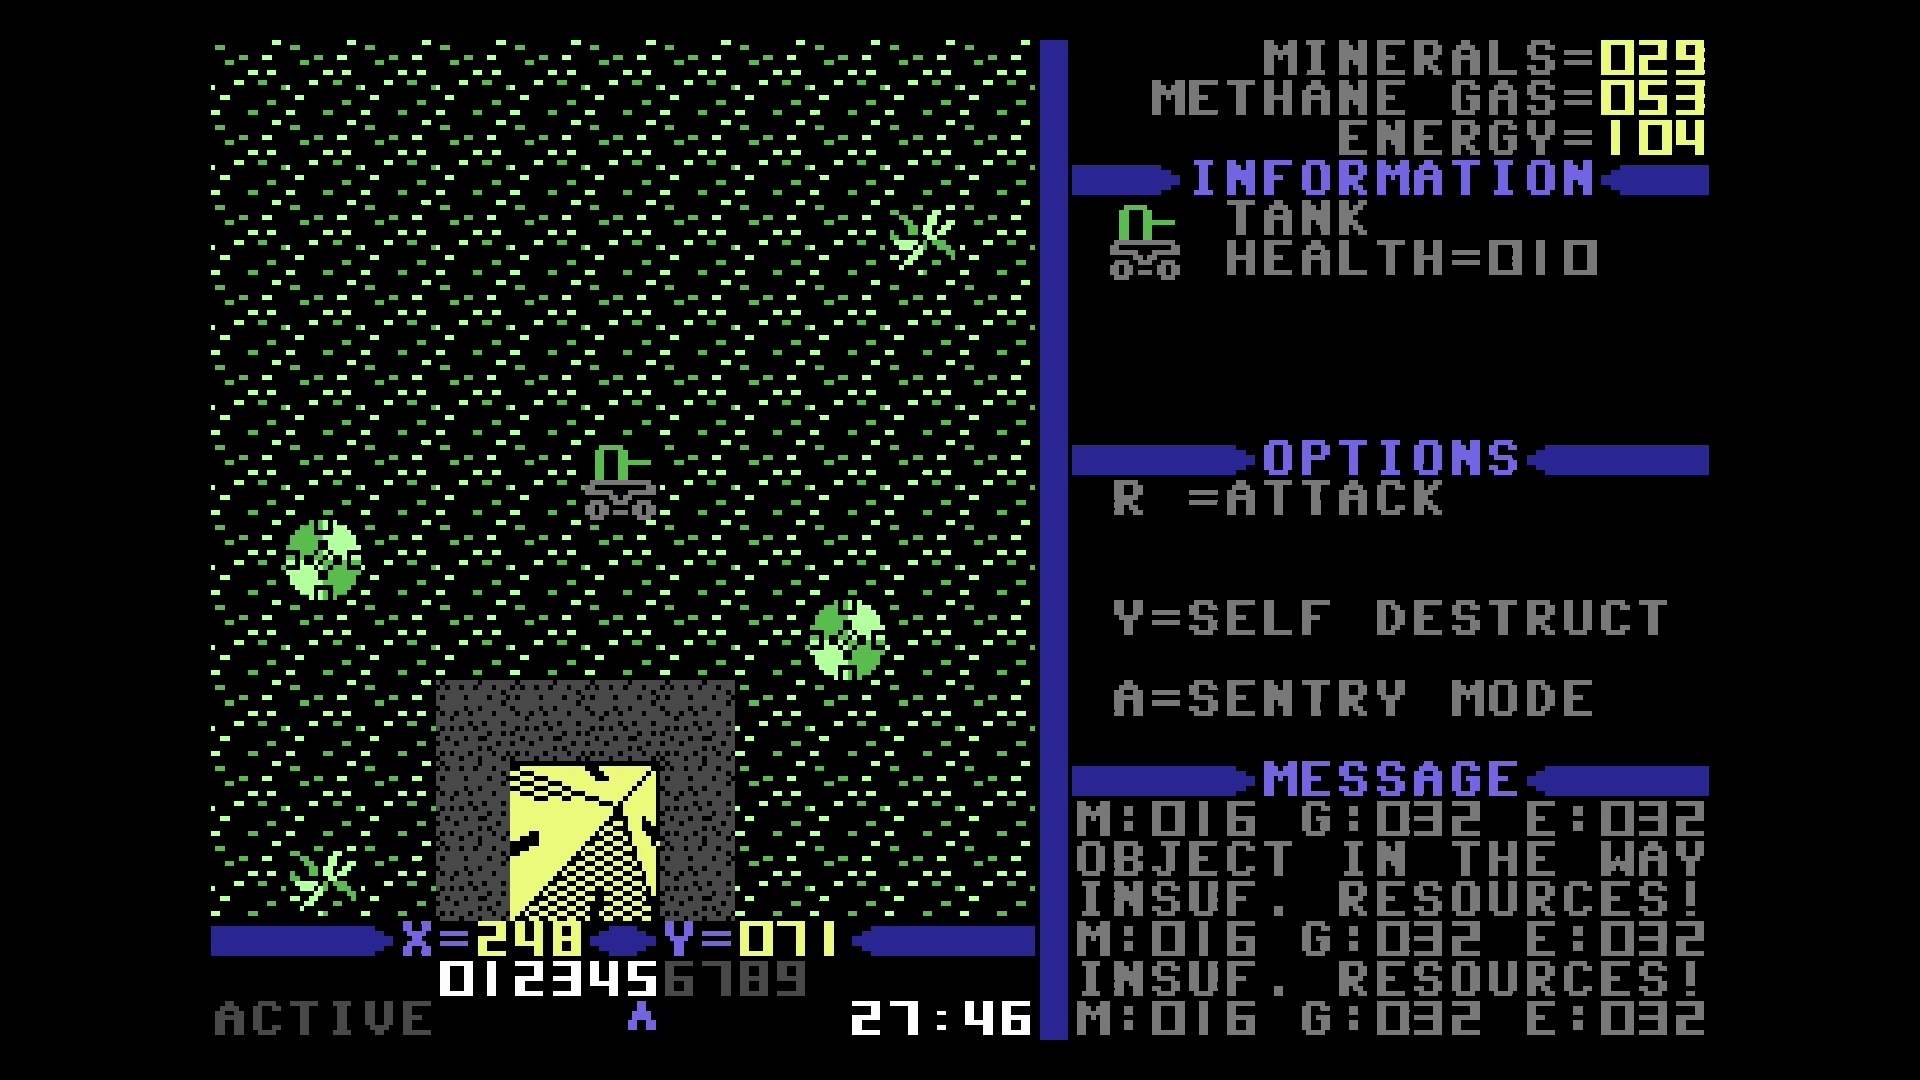
Now’s a good time to build a Tank and send it on a reconnaissance mission. By this point in the scenario, you’ve probably had at least a few aliens come a-knockin’ at your door, so head off in the direction they seem to be coming from and attempt to find their base. You’ll know you’re in the right place if you see the circular defensive turrets, as these typically surround the main Pyramid. Be careful, though; they’ll quickly fire on and destroy your Tank if you don’t act quickly. Your main goal is to find the coordinates of the main Pyramid — if your Tank doesn’t survive, don’t fret. So long as you have the coordinates, this is a net gain for you.
If you want to fire on a target with your Tank, press R1 and use the D-Pad to select a tile to target, then press R1 again to fire. If you press R1 twice in succession, your tank will fire at the last tile you targeted. This is useful if you want to repeatedly shoot a target that doesn’t go down in one hit.
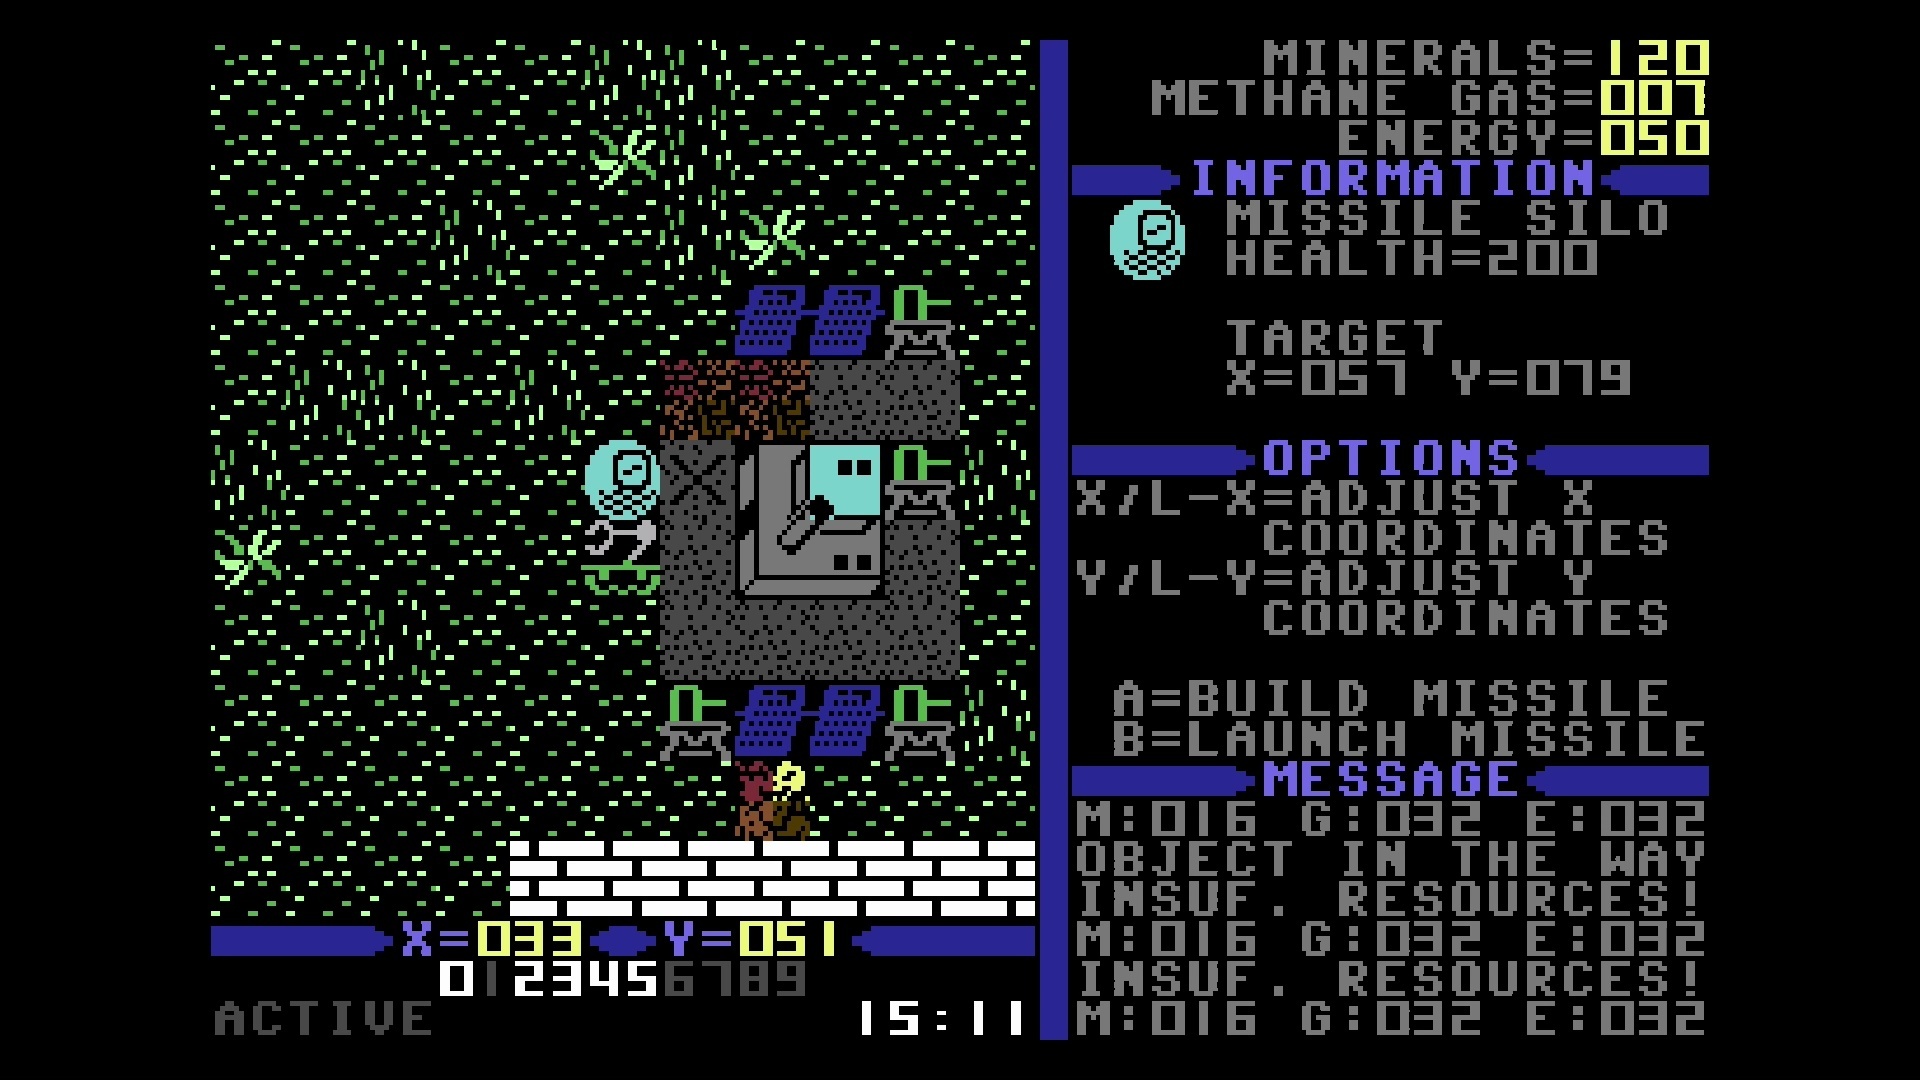
Switch back to your Missile Silo with L1+D-Pad and use X and L1+X to adjust the X coordinate, Y and L1+Y to adjust the Y coordinate until they match where you think the enemy base is. Assuming you’ve already built a missile, press B to launch and await the explosion. One missile is enough to immediately take out a Pyramid, though the blast radius (5 tiles both horizontally and vertically) usually isn’t enough to take out the turrets as well — so take care if you return to the area, as the defences will still be active, even though they have nothing to defend!
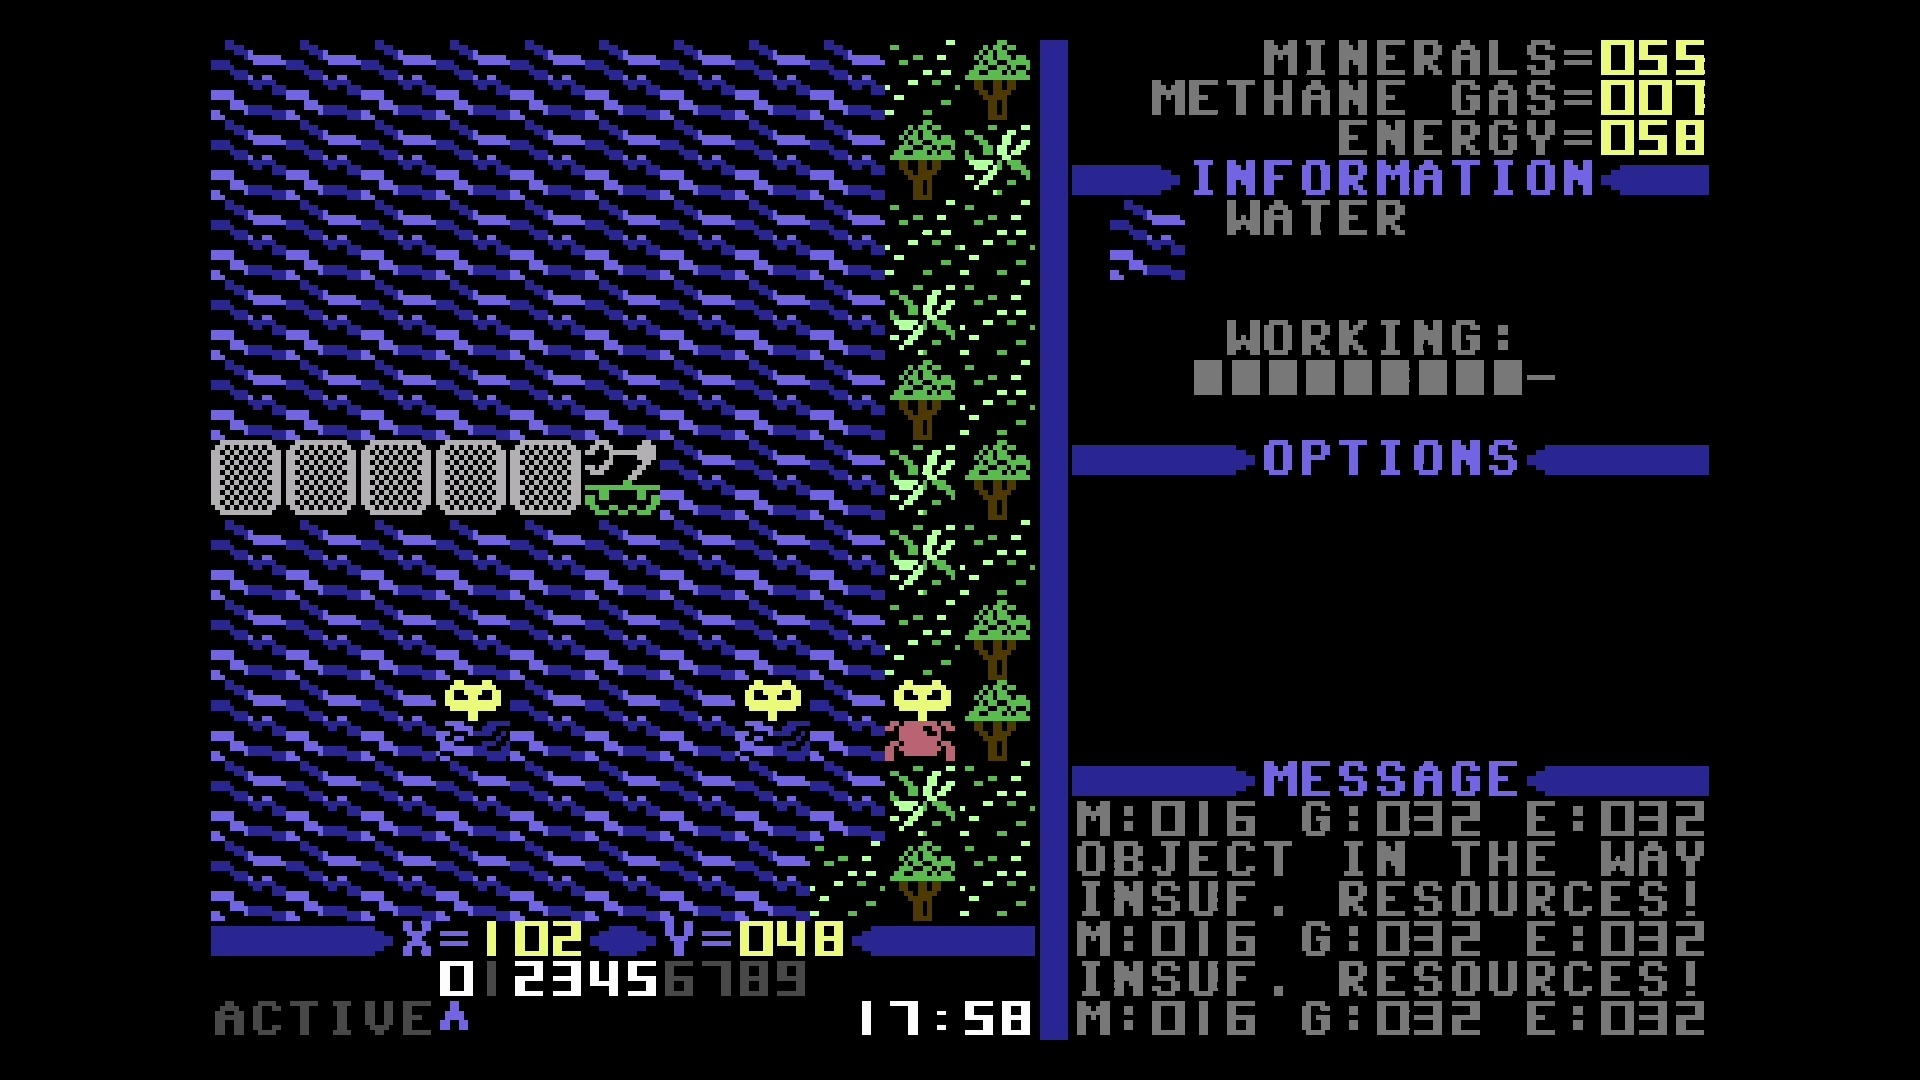
From here, it’s a case of exploring the rest of the map, tracking down the remaining enemy bases and wiping them off the face of Planet X2. If you’re confronted with a body of water, as you will be in this scenario, take a Builder there to construct a Bridge one tile at a time. Note that the aliens can swim and thus don’t need a Bridge of their own. It’s a good idea to take a Tank along with the Builder and place it in Sentry Mode near the start point of your Bridge. That way you can keep the Builder safe while it works.
Continue hunting down the enemy Pyramids and either firing missiles at them, or, if you can get close enough without being destroyed, setting a Tank to self-destruct by pressing Y. A Tank explodes with the same power and blast radius as a missile, but activating its self-destruct mode takes a couple of seconds, during which time turrets can make short work of it. This means it’s quite hard to use the self-destruct system effectively, unless you’ve picked off the turrets first.
And with that, you’re ready to conquer your first Planet X2 mission. To give you an extra helping hand in clearing out those pesky Protoids, here’s a full map of that initial scenario.
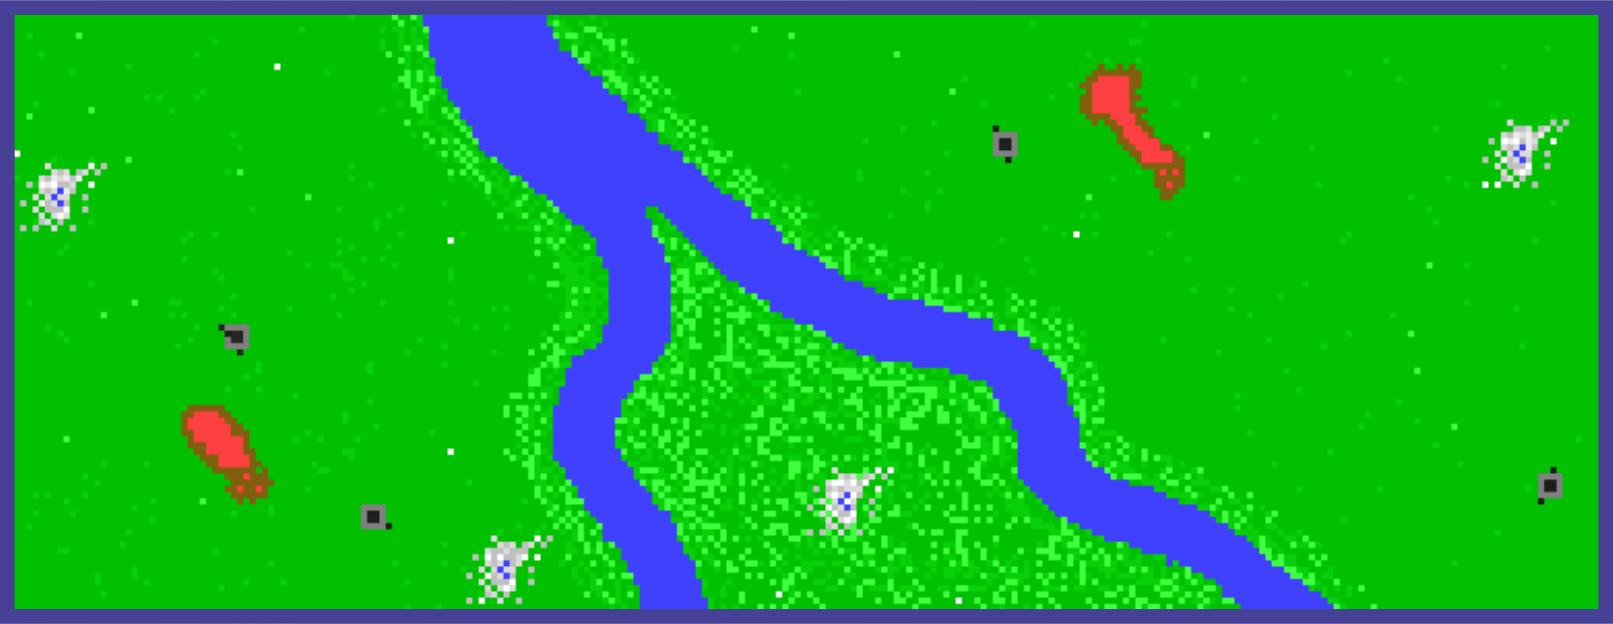
Don’t be discouraged if you fail first time around — it’s easy to forget things like resource management. Learn from your mistakes and try again, and soon you’ll be kicking Protoid botty like there’s no tomorrow.
Best of luck!
Planet X2 is available now as part of the Home Computer Heroes Collection 1 cartridge. Find out more here.