11
Oct
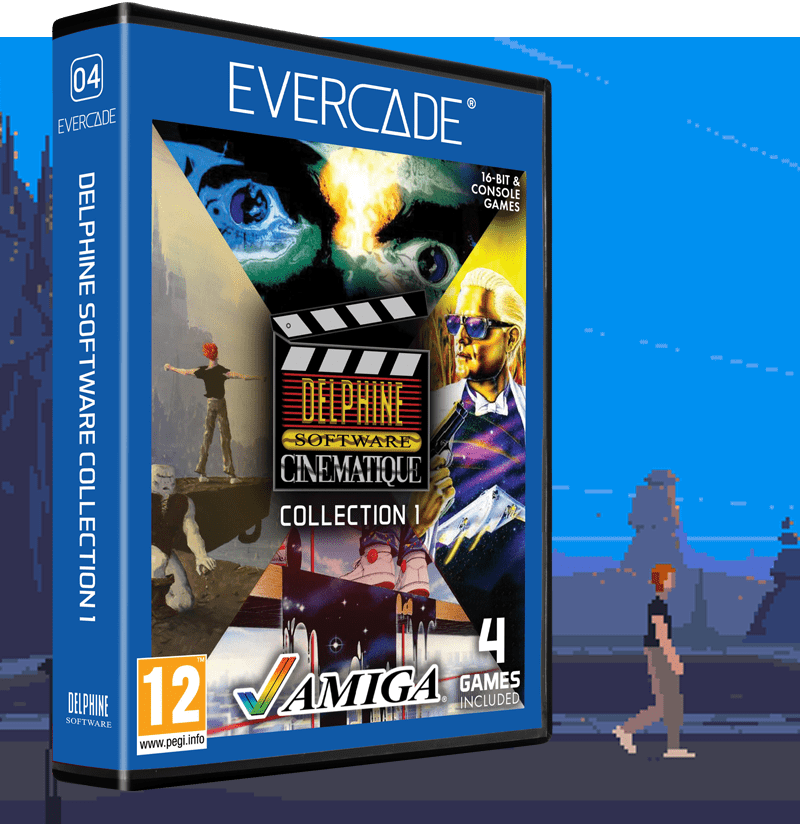
Getting Started with Delphine Software Collection 1
Delphine Software Collection 1 is out now for Evercade, bringing with it the wonderful games Another World, Flashback, Future Wars and Operation Stealth. Veterans of the 16-bit era will doubtless already be very much at home with all of these games, but if you’re a newcomer you may well be finding these games to be some of the most challenging in the Evercade library!
To that end, then, today we’re coming to the rescue with a handy walkthrough for the first bit of all four games. This should get you up and running with all of them — and perhaps get you into the frame of mind and style of thinking required to fully solve each of them. And if you’re still stuck… well, there’s always GameFAQs.
Evercade EXP owners: Some of these games have quite long cutscenes where you won’t be pressing anything, which will cause the EXP to assume you’re not actively playing and blank the screen in response to save battery. You can increase the amount of time before this happens in the Settings menu on the Evercade EXP — or just make sure you press something (the D-pad is generally safe) every so often during a cutscene to prevent the screen turning off at all.
Let’s begin!
Another World

Be sure to take a moment to watch Another World’s excellent introduction sequence in full if you haven’t already. Absolutely glorious stuff. This was done on a 16-bit home computer with no specialist 3D graphics hardware, no pre-rendered video, no streaming from CD or DVD. Impressive, non? Just don’t look at the bit with the keypad where our hero’s hand isn’t attached to an arm when he’s pressing the topmost buttons. I said don’t look at it.
Anyway, as impressive as Another World’s intro is, you don’t have to do anything until the game proper starts. This occurs the moment you see the underwater scene, there’s a big flash and Lester appears, still at his desk, rapidly sinking towards oblivion in the murky depths.

Escaping this waterlogged fate is easy: simply hold up on the D-Pad to cause Lester to swim to the surface. You can hold A while you’re doing this to make him swim slightly faster, but it isn’t necessary, nor does it make a lot of difference; just make sure you get out before he drowns or the tentacles at the bottom reach you.
After clambering out of the pool, head to the right. You’ll see some slug-like creatures on the ground and ceiling. There are two approaches you can take here. Firstly, you can hold down A and use the D-Pad to run to the right, tapping B or up on the D-Pad at the appropriate moments to jump over each slug. (Don’t worry about the beetle-looking thing.) This isn’t impossible, but do bear in mind you’ll have to do this again in the opposite direction in just a moment.

The much simpler approach is to walk carefully until you’re near each slug using the D-Pad without the A button, then kick them to destroy them. You can either do a short kick while standing by tapping the A button by itself, or crouch with down on the D-Pad first and then press A while still holding down to do a longer sweep kick. Either way, Lester’s white trainers need to make solid contact with a slug to destroy it.
There are two screens of slugs to deal with either way you see fit. Continue to the right until you get a cutscene of a horrible big black slobbering monster who wants very much to eat you, then immediately hold A and use left on the D-Pad to run like the clappers back the way you just came. Do not stop!

Eventually, you’ll reach a seemingly impassable chasm; make a leap of faith off the edge with B or up on the D-Pad as you reach the end to grab onto a vine. You’ll swing around behind the beast, so hold A and use right on the D-Pad to once again run like someone poured chilli sauce down your trousers until you meet your new “friends”.

Congratulations! You’ve beaten the first bit of Another World. The rest is up to you.
Flashback
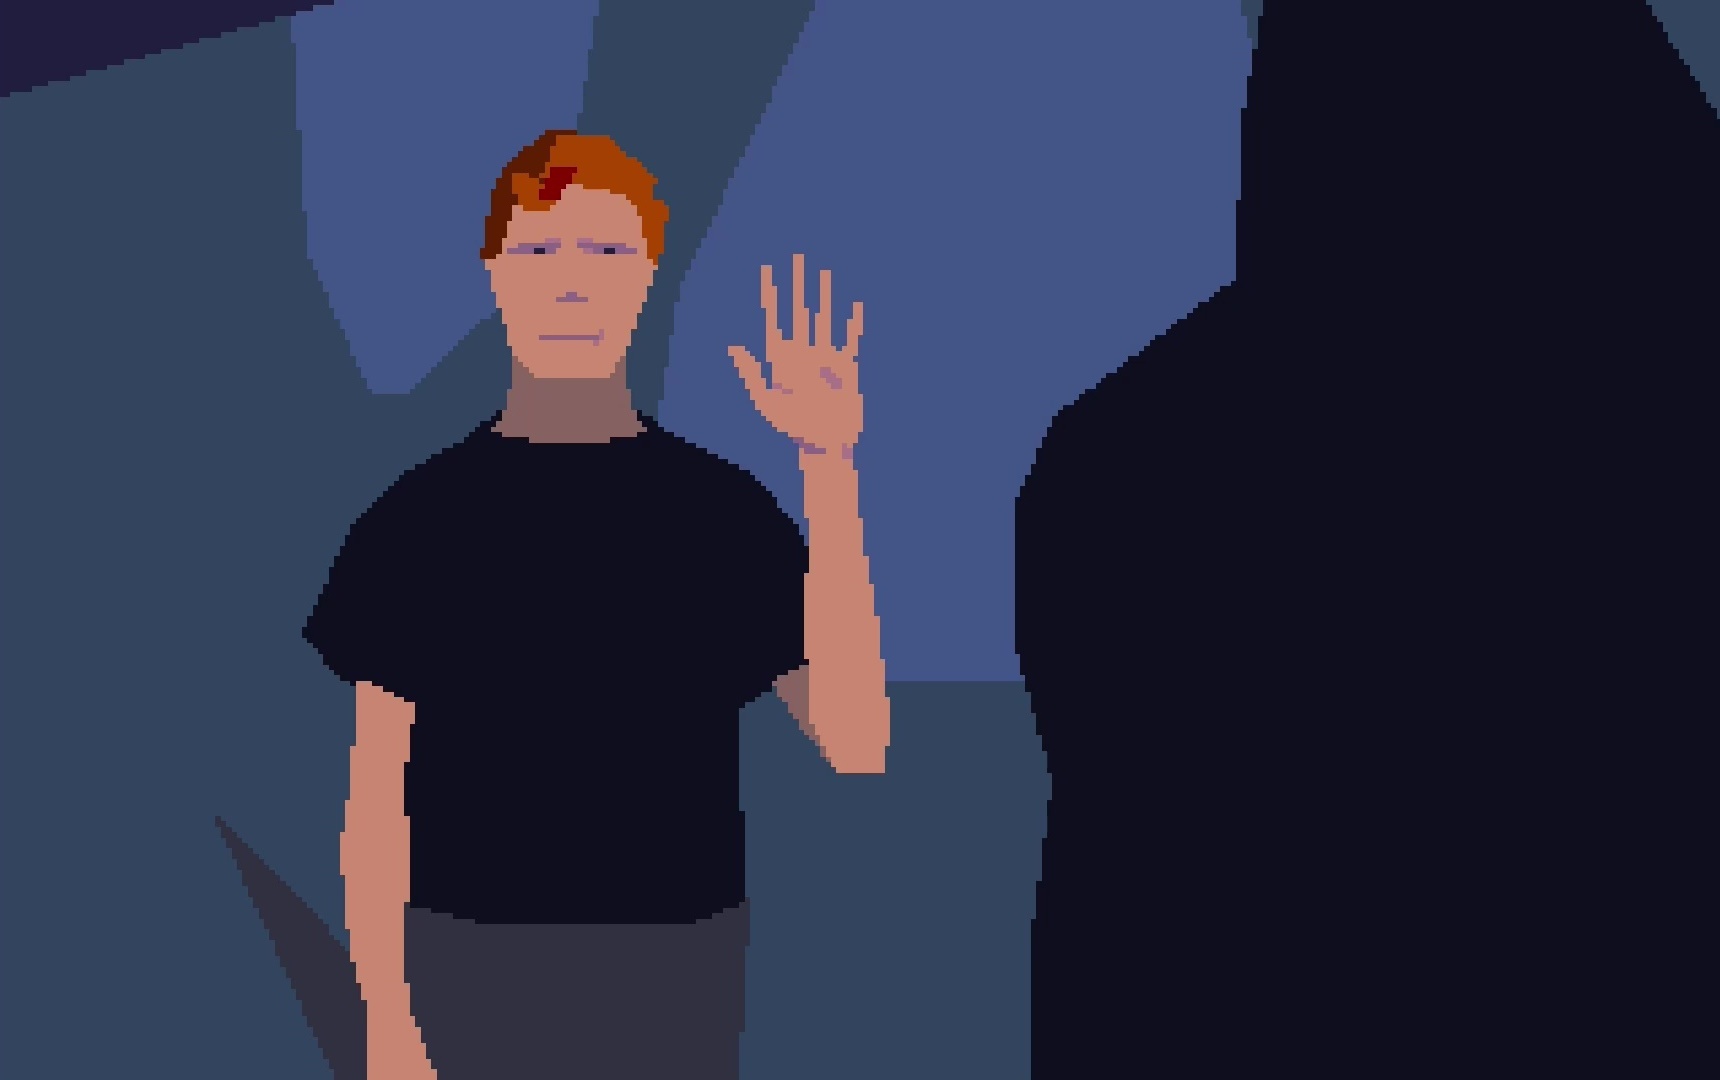
Like Another World, Flashback also has an impressive introductory sequence to enjoy that helps set the scene. Take a moment to enjoy it before beginning the game.

In the initial cutscene, you’ll notice that as Conrad wakes up, he knocks something grey off the platform he’s on. This is important! Flashback’s cutscenes are full of details like this, so always pay attention.
The mysterious object is called a Holocube, and you can find it by using the D-Pad to walk and drop down the platforms one by one. Get used to the height between platforms seen here, because this is a safe distance for Conrad to fall. Any further, and he will likely die from falling too far.

Drop down to the right, then the left, then the left again to fall off the bottom of the screen. You’ll see the Holocube sitting on a strange device that is making a noise. These objects are called “tripbeams” and are like switches that are active when something — either Conrad or an inanimate object — are sitting atop them. They’ll make that distinctive noise while active, as well as flashing their light. When they’re silent and unlit, they’re inactive. Later in the game, you may need to drop inventory items on them to activate them while you’re not standing on them. You can do this by crouching and pressing A with an inventory item selected. Not everything can be dropped.
Move to the left until the word “HOLOCUBE” appears at the top of the screen, crouch (D-Pad down) and press X to pick up the Holocube. You’ll get a brief cutscene if you do it right.

Now hit Start to open your inventory. Use the D-Pad to highlight the Holocube, then press Start to close your inventory. This puts the Holocube “in hand” and ready to use. Press A to use it, and you’ll get a long cutscene giving some further backstory.
Once you regain control of Conrad, use up on the D-Pad towards the edge of the platform on which you found the Holocube to clamber back up to the screen above. If it doesn’t work, take a step left or right to reposition and try again. Flashback’s movement works on an invisible “grid” system, so if you’re having trouble achieving something, taking a single step in one direction or another to move into a different “grid square” can often make the difference between success and failure.

Climb up to the top of the level — but instead of aiming for the platform where you started at the upper left, go for the upper right platform instead. Now walk off-screen to the right.
Draw your gun with B on the next screen and inch towards the edge of the platform, but don’t fall off. Note how the robotic drone thingy on the other side of the gap reacts to you. You can only destroy it while its little antenna is sticking out, and the most reliable means to do this is, with your gun out, crouch with down on the D-Pad to trigger the animation, and immediately start firing with X. You have no ammo limit, so blast away and hope for the best. If you fail to destroy the drone, stand up and crouch again to re-trigger the animation and blast away until it’s dead.

Now, to clear this gap, you need a running jump. Back up a bit from the edge of the platform — it’s easiest if you don’t move onto the next screen to do this — then hold X and tap right on the D-Pad. Do not hold right — just tap. Keep holding X and Conrad will keep running. When he enters the invisible “grid square” just before the edge of the platform, push up on the D-Pad and he will leap across the gap. You don’t need super-precise timing — just make sure you press up before he falls off the edge!
This opening sequence has taught you some important moves you’ll need to master throughout Flashback… from here, you’re on your own!
Future Wars
Take a moment to get to grips with Future Wars’ interface, as the rest of this guide will assume you know how to select actions and apply them. Press B to open a menu of verbs and select one with the D-Pad and A, then use the D-Pad to move the cursor until the name of the object in the scene you would like to perform the verb on appears. Then press A again to perform the action.
Pressing A on the scene without selecting a verb will cause you to walk to that location. You will usually need to approach objects manually before you can interact with them.

After the opening sequence and a dressing-down from your boss, pick up the bucket, then examine the scaffolding and operate the red button to raise the cradle. Operate the window to open it and enter the building.
Walk to the lower-right corner of the carpet until you get the message “I can feel something under my feet…”, then operate the carpet. You’ll find a key.

Examine the waste-paper basket and take the plastic bag. You’ll likely need to approach the bin first — get used to that “Come a little closer!” message.
Enter the bathroom to the left and operate the cupboard to open it. Take the insecticide from within. Operate the door to the toilet and take the little flag (the tiny red object) from the floor.

Use the empty bucket from your inventory on the sink to fill it. Return to the room on the right and stand in front of the door to the rear of the room, and use the full bucket on the door. Operate the door on the right and have a good laugh at your boss’ expense, then proceed through the door. Quickly!
Use the key you found on the leftmost cupboard in the background. Examine the typewriter to learn a numerical code. Operate the drawer in the desk and take the sheaf of blank paper. You may wish to save before the following sequence.

Examine the map on the wall and use the little flag on the little hole (it’s around eastern Europe, a little west of the easternmost flag). Pass through the doorway to find yourself in a secret room… with a trap, of course. Quickly examine the keypad to the right of the door and operate the numbers 40315 in succession.
Don’t panic — you have plenty of time to achieve this, but try and make every second count. Note that the action pauses while the verb menu is up. It’s a good idea to move the cursor near the keypad before pressing B to pop up the verb menu, as this means you have less distance to move when choosing the button to operate.

Pass through the door and… you’re on your own from here!
Operation Stealth
Operation Stealth’s interface works almost identically to Future Wars with one notable exception: if you press B on a verb in the menu instead of A, you can attempt to perform that action on an inventory item instead of something in the scene.

After the introductory sequence, examine the coin return slot (not the coin slot) on the vending machine on the left of the scene. Use the coin on the coin slot to get a newspaper. Then enter the door on the left to go into the toilets. Walk into the rightmost cubicle.
Operate your briefcase from your inventory (remember, press B on “Operate” instead of A to perform the action on an inventory item) to open it. Take the pen, the bench of notes and the passport. Operate the calculator to open the secret compartment in the case.

Examine the newspaper from your inventory and make a mental note of the country that is in negotiations with Santa Paragua — it can be one of several. Operate the arrow keys on the passport falsifier until the display matches the country name in the article you just read. Take the unused passport and use it on the opening in the side of the passport falsifier. Operate the red Enter button, then operate the false bottom then the briefcase to close it up.
Exit the cubicle and the toilets, and use your false passport on the customs official. Speak with the Welcome hostess to receive a telegram, then examine it from your inventory to read it.

Walk off-screen to the left and use your airline ticket on the gun-toting guard. Walk off the screen to the left behind the glass (behind the “Salida” sign) to reach the baggage reclaim carousel. Examine the baggage until you find the one that matches the name on the telegram you got from the hostess, then take it. Operate the baggage from your inventory to find your razor and watch gadgets.
Walk off-screen to the right to return to the main concourse, then enter the door on the right to enter yet another toilet. Operate the razor from your inventory to reveal a cable. Use the electric cable on the wall outlet near the sink to retrieve an important message. Use the baggage on the bin by the door to dispose of it, then leave and return to the concourse.

Use your fake passport on the customs official, then pass through the gate and walk off the screen to the left to reach the taxi rank. You’re on your own from here!
Delphine Software Collection 1 is available for Evercade now. Find out more on the official cartridge page.